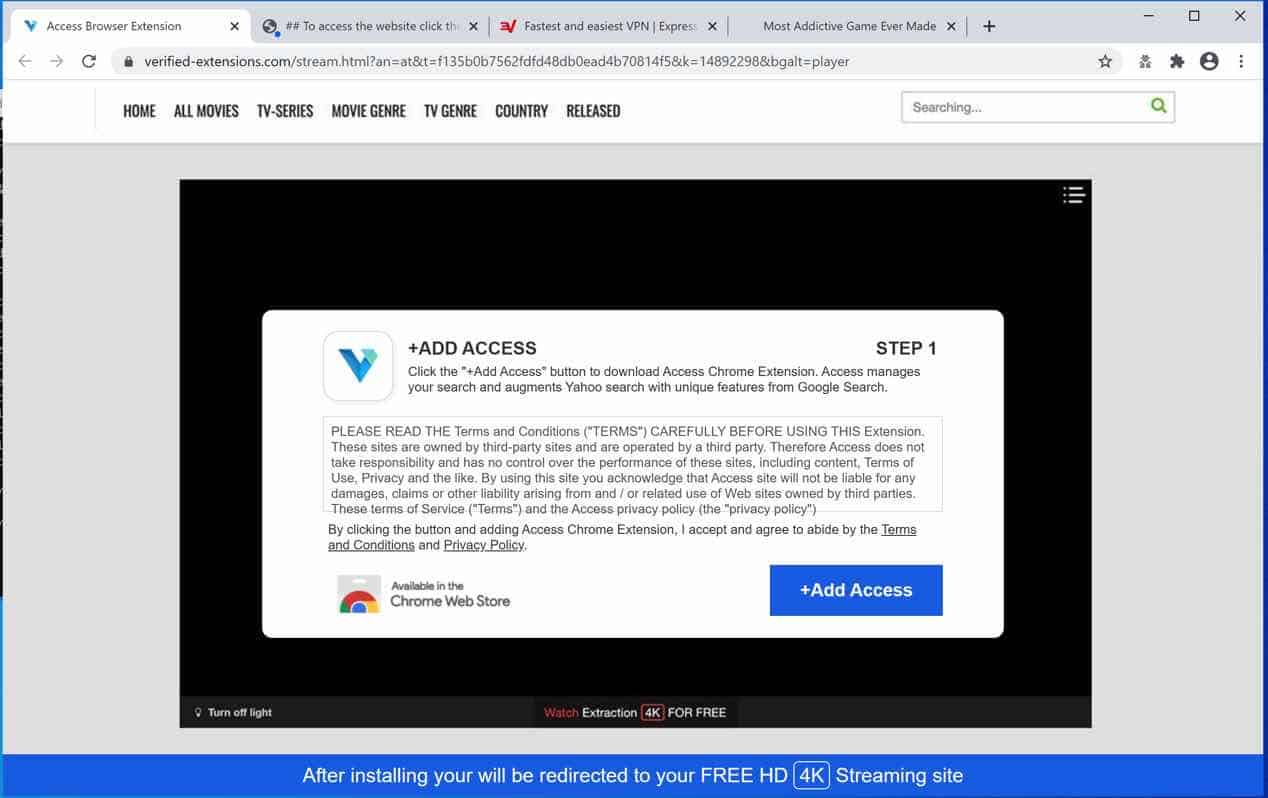
Verified-extensions.com is a website, promoting adware browser extensions. If your computer is infected with adware, then Verified-extensions.com advertisements constantly show up in your browser.
Not only adware is responsible for the Verified-extensions.com pop-up ads. On the Internet, ad networks can also redirect your browser to Verified-extensions.com. Some websites redirect users through ad networks to generate revenue. Therefore your browser may end up on the Verified-extensions.com site.
I recommend that you check your computer for adware with Malwarebytes. Malwarebytes is free to check your computer for adware. If adware is found on your computer, you can use Malwarebytes to remove it for free.
This way, you will not run the risk of unwanted advertisements from Verified-extensions.com and other sites that hijack your browser again.
Remove Verified-extensions.com pop-up ads

 Remove Verified-extensions.com pop-up ads with Malwarebytes
I recommend removing Verified-extensions.com redirect with Malwarebytes. Malwarebytes is a comprehensive adware removal tool and free to use.
Adware leaves traces such as malicious files, registry keys, scheduled tasks on your device, make sure to completely remove unwanted ads from Verified-extensions.com with Malwarebytes.
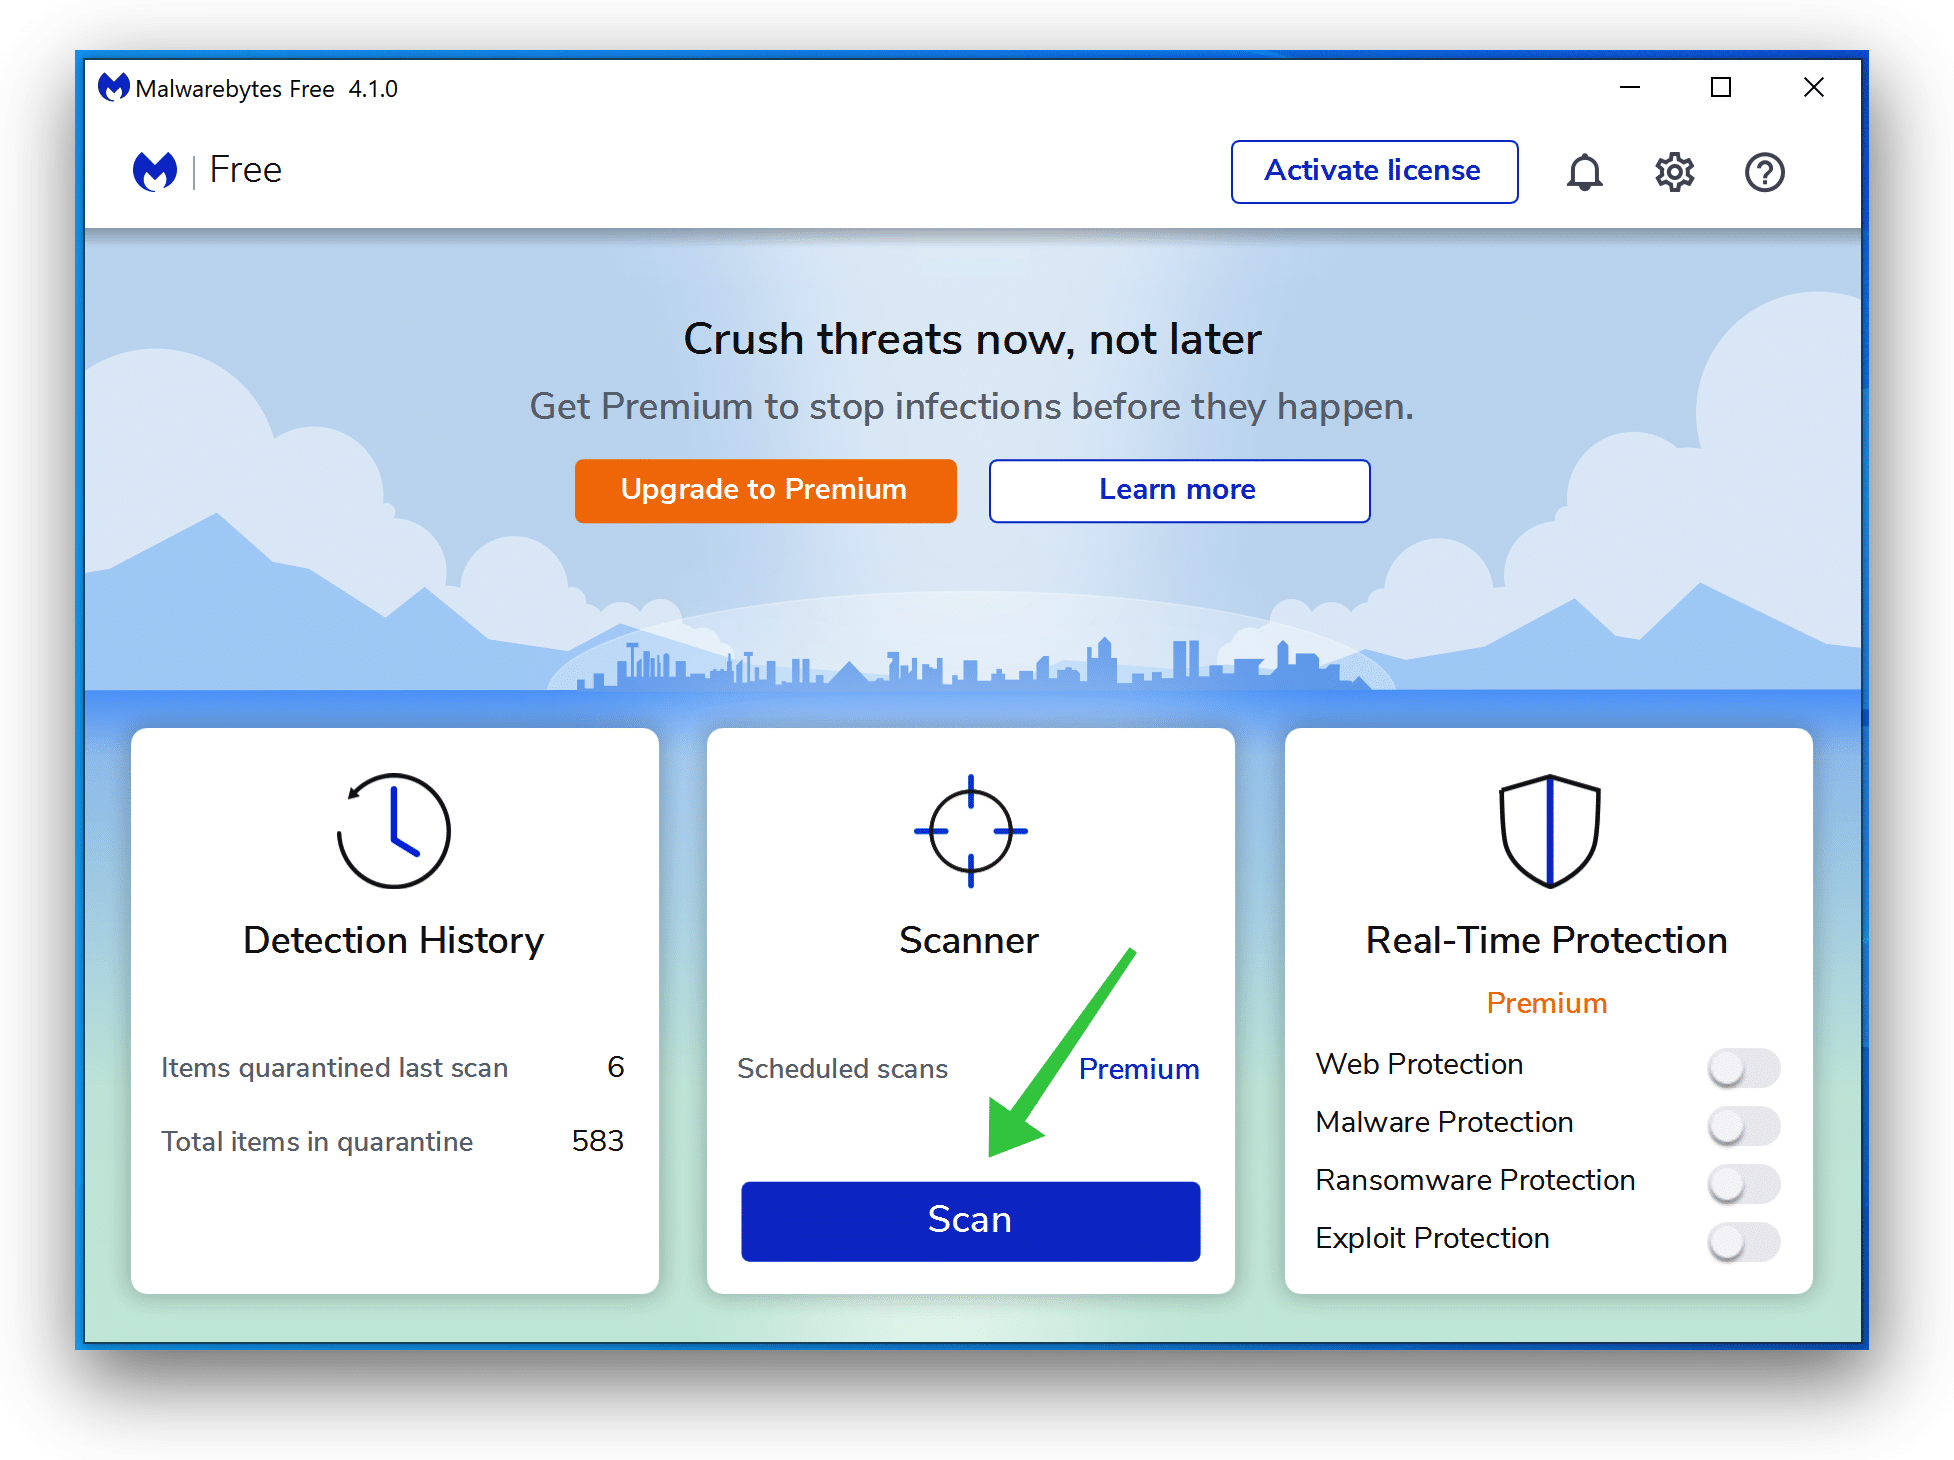
- Install Malwarebytes, follow on-screen instructions.
- Click Scan to start a malware-scan.

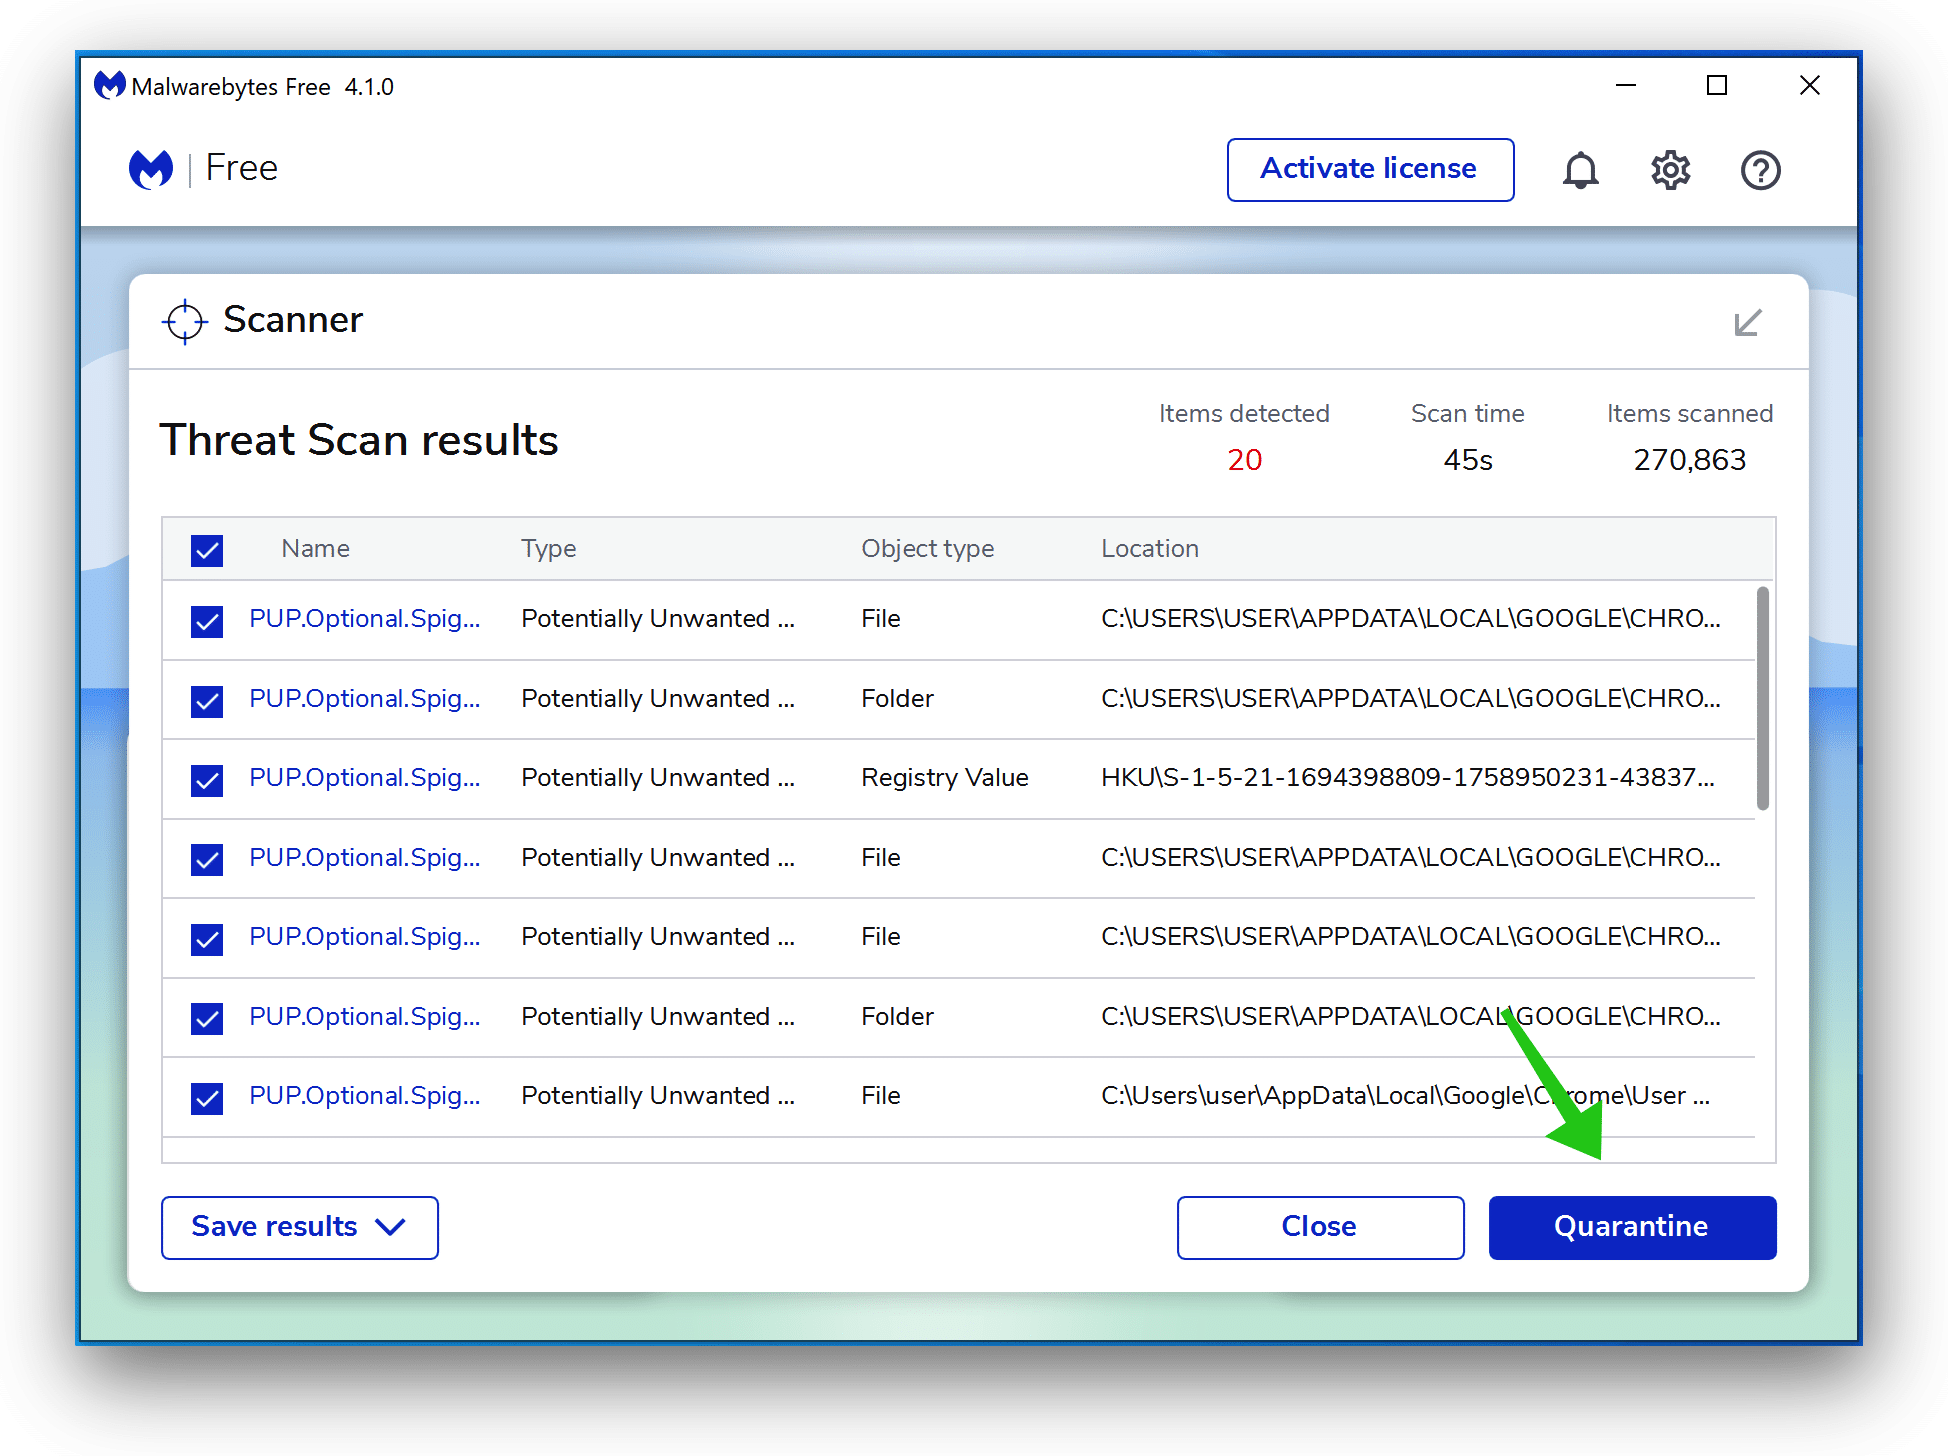
- Wait for the Malwarebytes scan to finish.
- Once completed, review the Verified-extensions.com adware detections.
- Click Quarantine to continue.

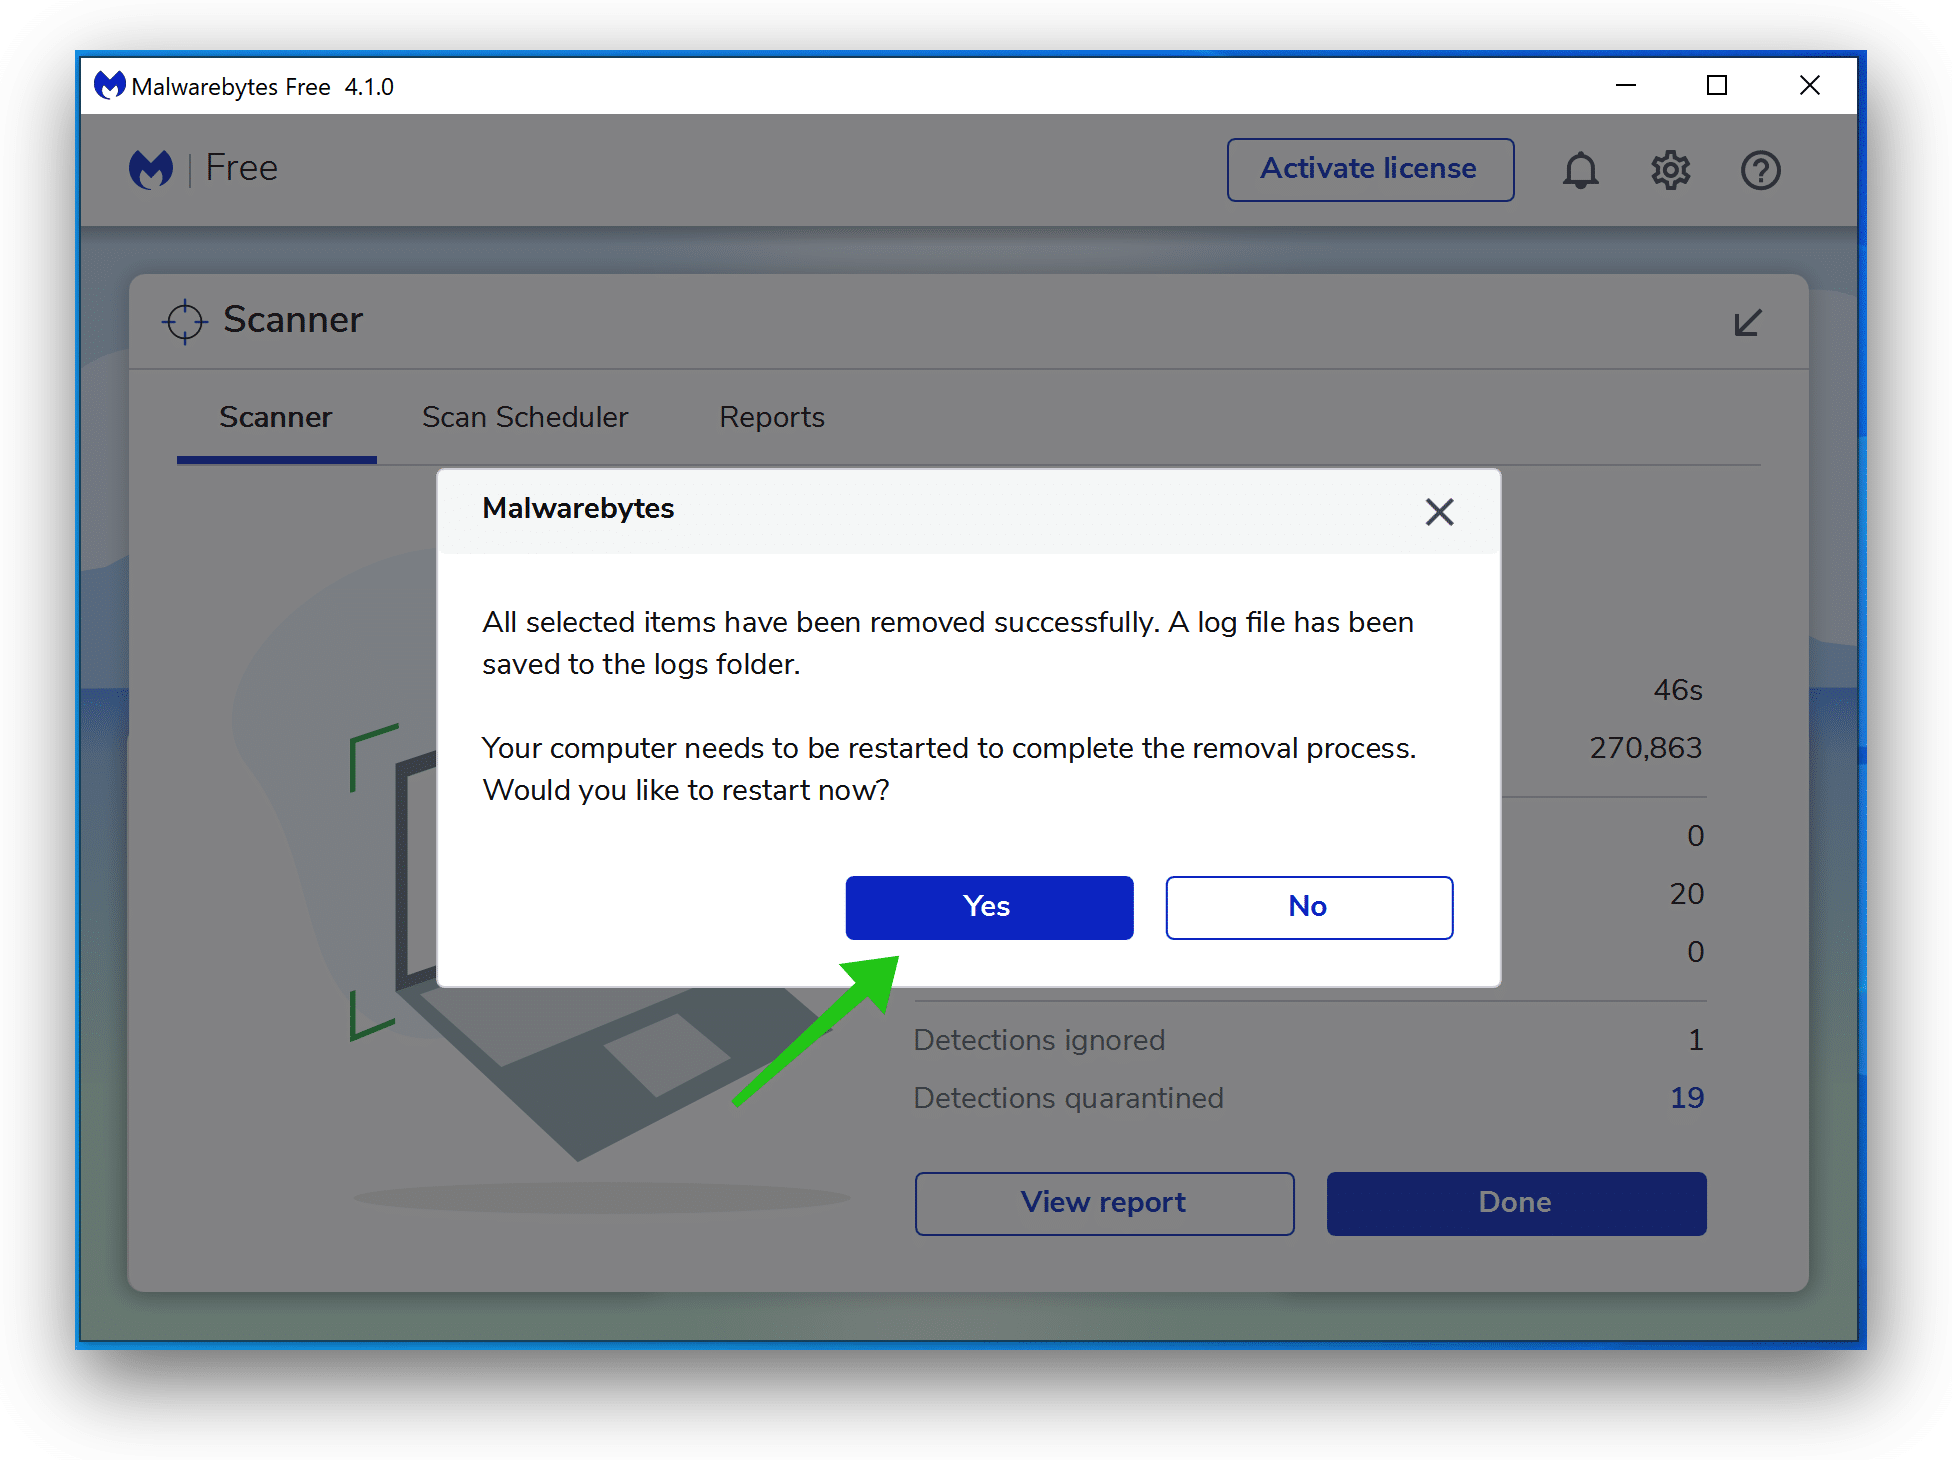
- Reboot Windows after all the detections are moved to quarantine.

You have now successfully removed adware that is responsible for Verified-extensions.com ads from your computer.
 Remove Verified-extensions.com from Google Chrome
- Open Google Chrome.
- In the top-right corner, expand the Chrome menu.
- In the Google Chrome menu, open Settings.
- At the Privacy and Security section, click Site settings.
- Open the Notifications settings.
- Remove Verified-extensions.com by clicking the three dots on the right next to the Verified-extensions.com URL and click Remove.
 Remove Verified-extensions.com from Android
- Open Google Chrome
- In the top-right corner, find the Chrome menu.
- In the menu tap Settings, scroll down to Advanced.
- In the Site Settings section, tap the Notifications settings, find the Verified-extensions.com domain, and tap on it.
- Tap the Clean & Reset button and confirm.
 Remove Verified-extensions.com from Firefox
- Open Firefox
- In the top-right corner, click the Firefox menu (three horizontal stripes).
- In the menu go to Options, in the list on the left go to Privacy & Security.
- Scroll down to Permissions and then to Settings next to Notifications.
- Select the Verified-extensions.com URL from the list, and change the status to Block, save Firefox changes.
 Remove Verified-extensions.com from Internet Explorer
- Open Internet Explorer.
- In the top right corner, click on the gear icon (menu button).
- Go to Internet Options in the menu.
- Click on the Privacy tab and select Settings in the pop-up blockers section.
- Find the Verified-extensions.com URL and click the Remove button to remove the domain.
 Remove Verified-extensions.com from Edge
- Open Microsoft Edge.
- In the top right corner, click on the three dots to expand the Edge menu.
- Scroll down to Settings, scroll further down to Advanced Settings
- In the Notification section click Manage.
- Click to Disable the on switch for the Verified-extensions.com URL.
 Remove Verified-extensions.com from Safari on Mac
- Open Safari. In the top left corner, click on Safari.
- Go to Preferences in the Safari menu, now open the Websites tab.
- In the left menu click on Notifications
- Find the Verified-extensions.com domain and select it, click the Deny button.