How to Remove Harmonypix.com? Learn how to get rid of Harmonypix.com pop-up ads from your computer, phone, or tablet using step-by-step instructions.
If your Windows or Mac computer, Android, or iOS phone starts showing unfamiliar or undesirable advertisements originating from Harmonypix.com, you have inadvertently enabled notifications from this malicious website. Although notifications serve a legitimate purpose in web browsers, Harmonypix.com exploits this functionality. It presents a deceitful message to persuade you to click the Allow button within your web browser.
Read more below on how it works.
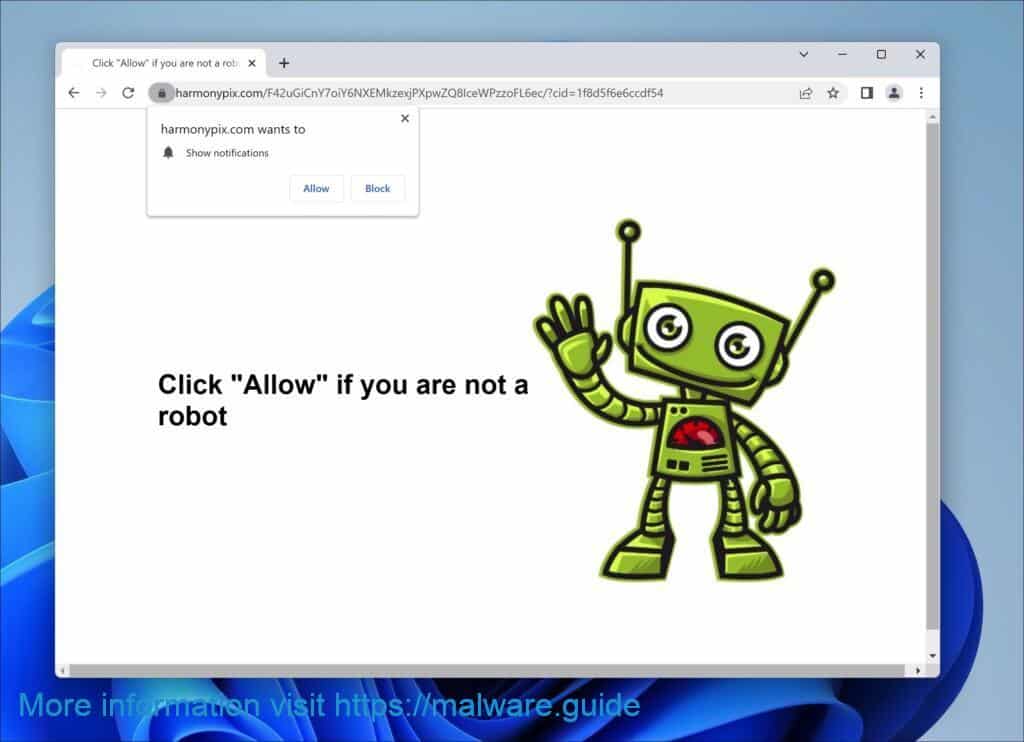
The malicious advertising networks exploit fake Harmonypix.com push notifications to deceive users into interacting with them, leading to various unfavorable consequences. One common purpose of these fake push notifications is to drive traffic toward scams or phishing websites designed to steal personal information or infect the user’s device with malware.
Additionally, these notifications promote unwanted or malicious software by tricking users into downloading or installing it. This can include adware, spyware, or other malicious software that compromises the user’s device and their privacy. In certain instances, fake push notifications generate revenue for malicious advertising networks by enticing users to click on ads or subscribe to paid or even malicious online services.
How to remove Harmonypix.com
In this guide, I will guide you through several steps that check your computer for adware, potentially unwanted programs, and other malware. This is a step-by-step guide where we start by checking the browser, then the installed apps in Windows 11 or 10, and then I recommend several tools to detect and remove malware automatically. Lastly, I recommend a browser extension that will prevent your PC from being infected with adware again to avoid popups like Harmonypix.com in the future.
Step 1: Remove permission for Harmonypix.com to send push notifications using the browser
First, we will remove the permission for Harmonypix.com from the browser. This will prevent Harmonypix.com from sending notifications through the browser any longer. Once you have performed this, the notifications will stop, and you will no longer see unwanted advertisements through the browser.
Follow the instructions for the browser you have set as your default browser. Make sure you remove the permission for Harmonypix.com from the browser settings. To do so, see the steps below for the corresponding browser.
 Remove Harmonypix.com from Google Chrome
- Open Google Chrome.
- In the top-right corner, expand the Chrome menu.
- In the Google Chrome menu, click on Settings.
- At the Privacy and Security section, click on Site settings.
- Next, click the Notifications settings.
- Remove Harmonypix.com by clicking the three dots on the right next to the Harmonypix.com URL and Remove.
→ Go to the next step: Malwarebytes.
 Remove Harmonypix.com from the Android
- Open Google Chrome
- In the top-right corner, find the Chrome menu.
- In the menu, tap Settings, and scroll down to Advanced.
- In the Site Settings section, tap the Notifications settings, find the Harmonypix.com domain, and tap on it.
- Tap the Clean & Reset button and confirm.
→ Go to the next step: Malwarebytes.
 Remove Harmonypix.com from Firefox
- Open Firefox
- In the top-right corner, click the Firefox menu (three horizontal stripes).
- In the menu, click on Options.
- In the list on the left, click on Privacy & Security.
- Scroll down to Permissions and then to Settings next to Notifications.
- Select the Harmonypix.com URL from the list, and change the status to Block, save Firefox changes.
→ Go to the next step: Malwarebytes.
 Remove Harmonypix.com from Edge
- Open Microsoft Edge.
- Click on the three dots in the top right corner to expand the Edge menu.
- Scroll down to Settings.
- In the left menu, click on Site permissions.
- Click on Notifications.
- Click on the three dots on the right of the Harmonypix.com domain and Remove them.
→ Go to the next step: Malwarebytes.
 Remove Harmonypix.com from Safari on Mac
- Open Safari. In the top left corner, click on Safari.
- Go to Preferences in the Safari menu and open the Websites tab.
- In the left menu, click on Notifications
- Find the Harmonypix.com domain and select it, and click the Deny button.
→ Go to the next step: Malwarebytes.
Step 2: Remove adware browser extensions
 Google Chrome
- Open Google Chrome.
- type: chrome://extensions/ in the address bar.
- Search for any adware browser extensions and click the “Remove” button.
It is important to your check every extension installed. If you do not know or do not trust a specific extension, remove or disable it.
→ See the next step: Malwarebytes.
 Firefox
- Open Firefox browser.
- type: about:addons in the address bar.
- Search for any adware browser add-ons and click the “Uninstall” button.
It is important to your check every addon installed. If you do not know or do not trust a specific addon, remove or disable it.
→ See the next step: Malwarebytes.
 Microsoft Edge
- Open the Microsoft Edge browser.
- type: edge://extensions/ in the address bar.
- Search for any adware browser extensions and click the “Remove” button.
It is important to your check every extension installed. If you do not know or do not trust a specific extension, remove or disable it.
→ See the next step: Malwarebytes.
 Safari
- Open Safari.
- In the top left corner, click on the Safari menu.
- In the Safari menu, click on Preferences.
- Click on the Extensions tab.
- Click on the unwanted extension you want to be removed, then Uninstall.
→ See the next step: Malwarebytes.
It is important to your check every extension installed. If you do not know or do not trust a specific extension, uninstall the extension.
Step 3: Uninstall adware software
In this second step, we will check your computer for adware software. In many cases, adware is installed by you as a user yourself. This is because adware is bundled with other software you can download for free from the Internet.
Adware is then offered as a helpful tool or an “offering” during installation. If you do not pay attention and quickly click through the installation process, you will install adware on your computer. Thus, this is done misleadingly. If you want to avoid this, you can use Unchecky software. Using the steps below, check for adware installed on your computer and remove it.
Windows 11
- Click on “Start.”
- Click on “Settings.”
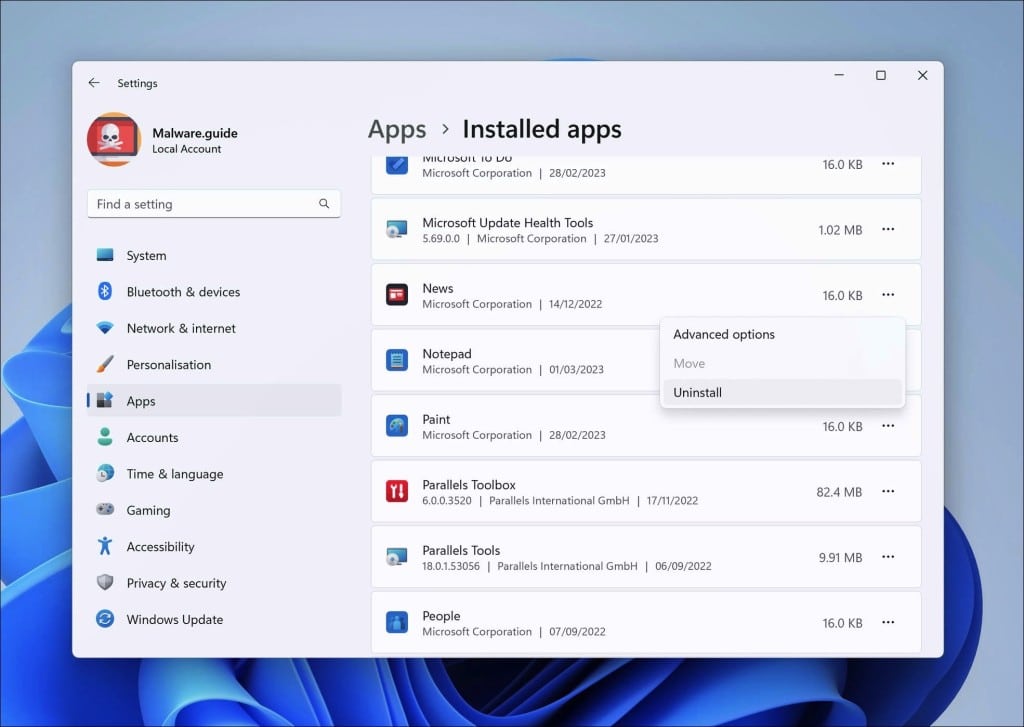
- Click on “Apps.”
- Lastly, click on “Installed apps.”
- Search for any unknown or unused software in the list of recently installed apps.
- On the right-click on the three dots.
- In the menu, click on “Uninstall.”
→ See the next step: Malwarebytes.
Windows 10
- Click on “Start.”
- Click on “Settings.”
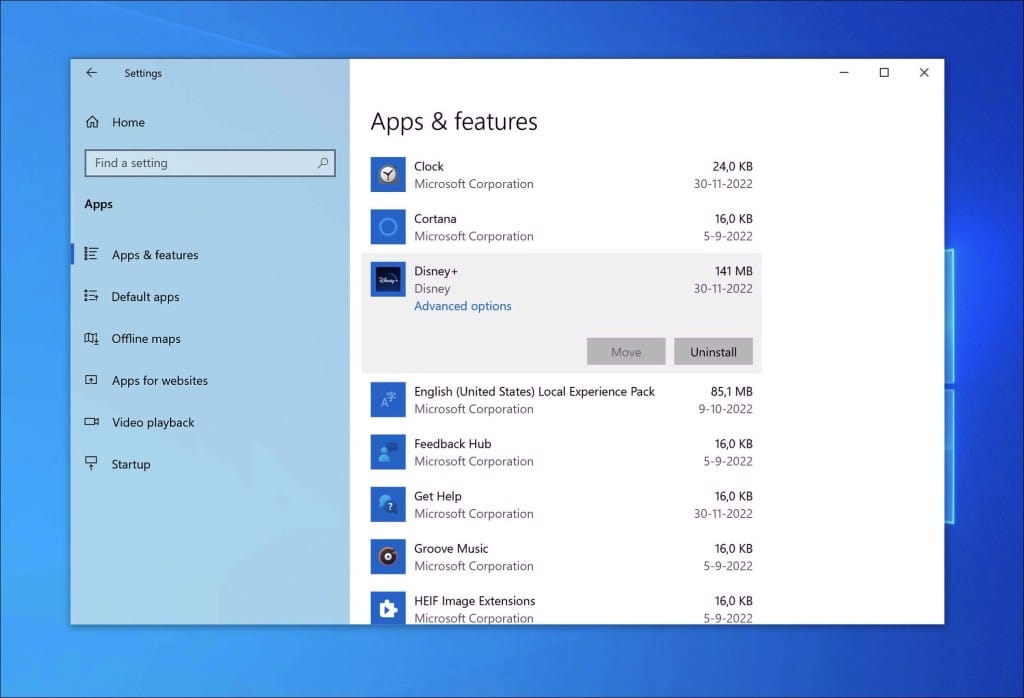
- Click on “Apps.”
- In the list of apps, search for any unknown or unused software.
- Click on the app.
- Lastly, click on the “Uninstall” button.
→ See the next step: Malwarebytes.
Step 4: Scan your PC for malware
Now that you have uninstalled adware apps, I advise you to check the computer for any other malware for free.
It is not recommended to remove malware manually because it can be difficult for non-technical people to identify and remove all the traces of malware. Manually removing malware involves finding and deleting files, registry entries, and other often hidden details. It can damage your computer or leave it vulnerable to further attacks if not done correctly. So, please install and run the malware removal software, which you can find in this step.
Malwarebytes
Use Malwarebytes to detect adware such as Harmonypix.com and other malware on your computer. The advantage of Malwarebytes is that it is free to detect and remove malware. Malwarebytes is capable of removing different types of malware. In addition to removal, it also offers protection against malware. I recommend using Malwarebytes if only to have checked your computer for malware once.
- Download Malwarebytes
- Install Malwarebytes, and follow the on-screen instructions.
- Click Scan to initiate a malware scan on your PC.
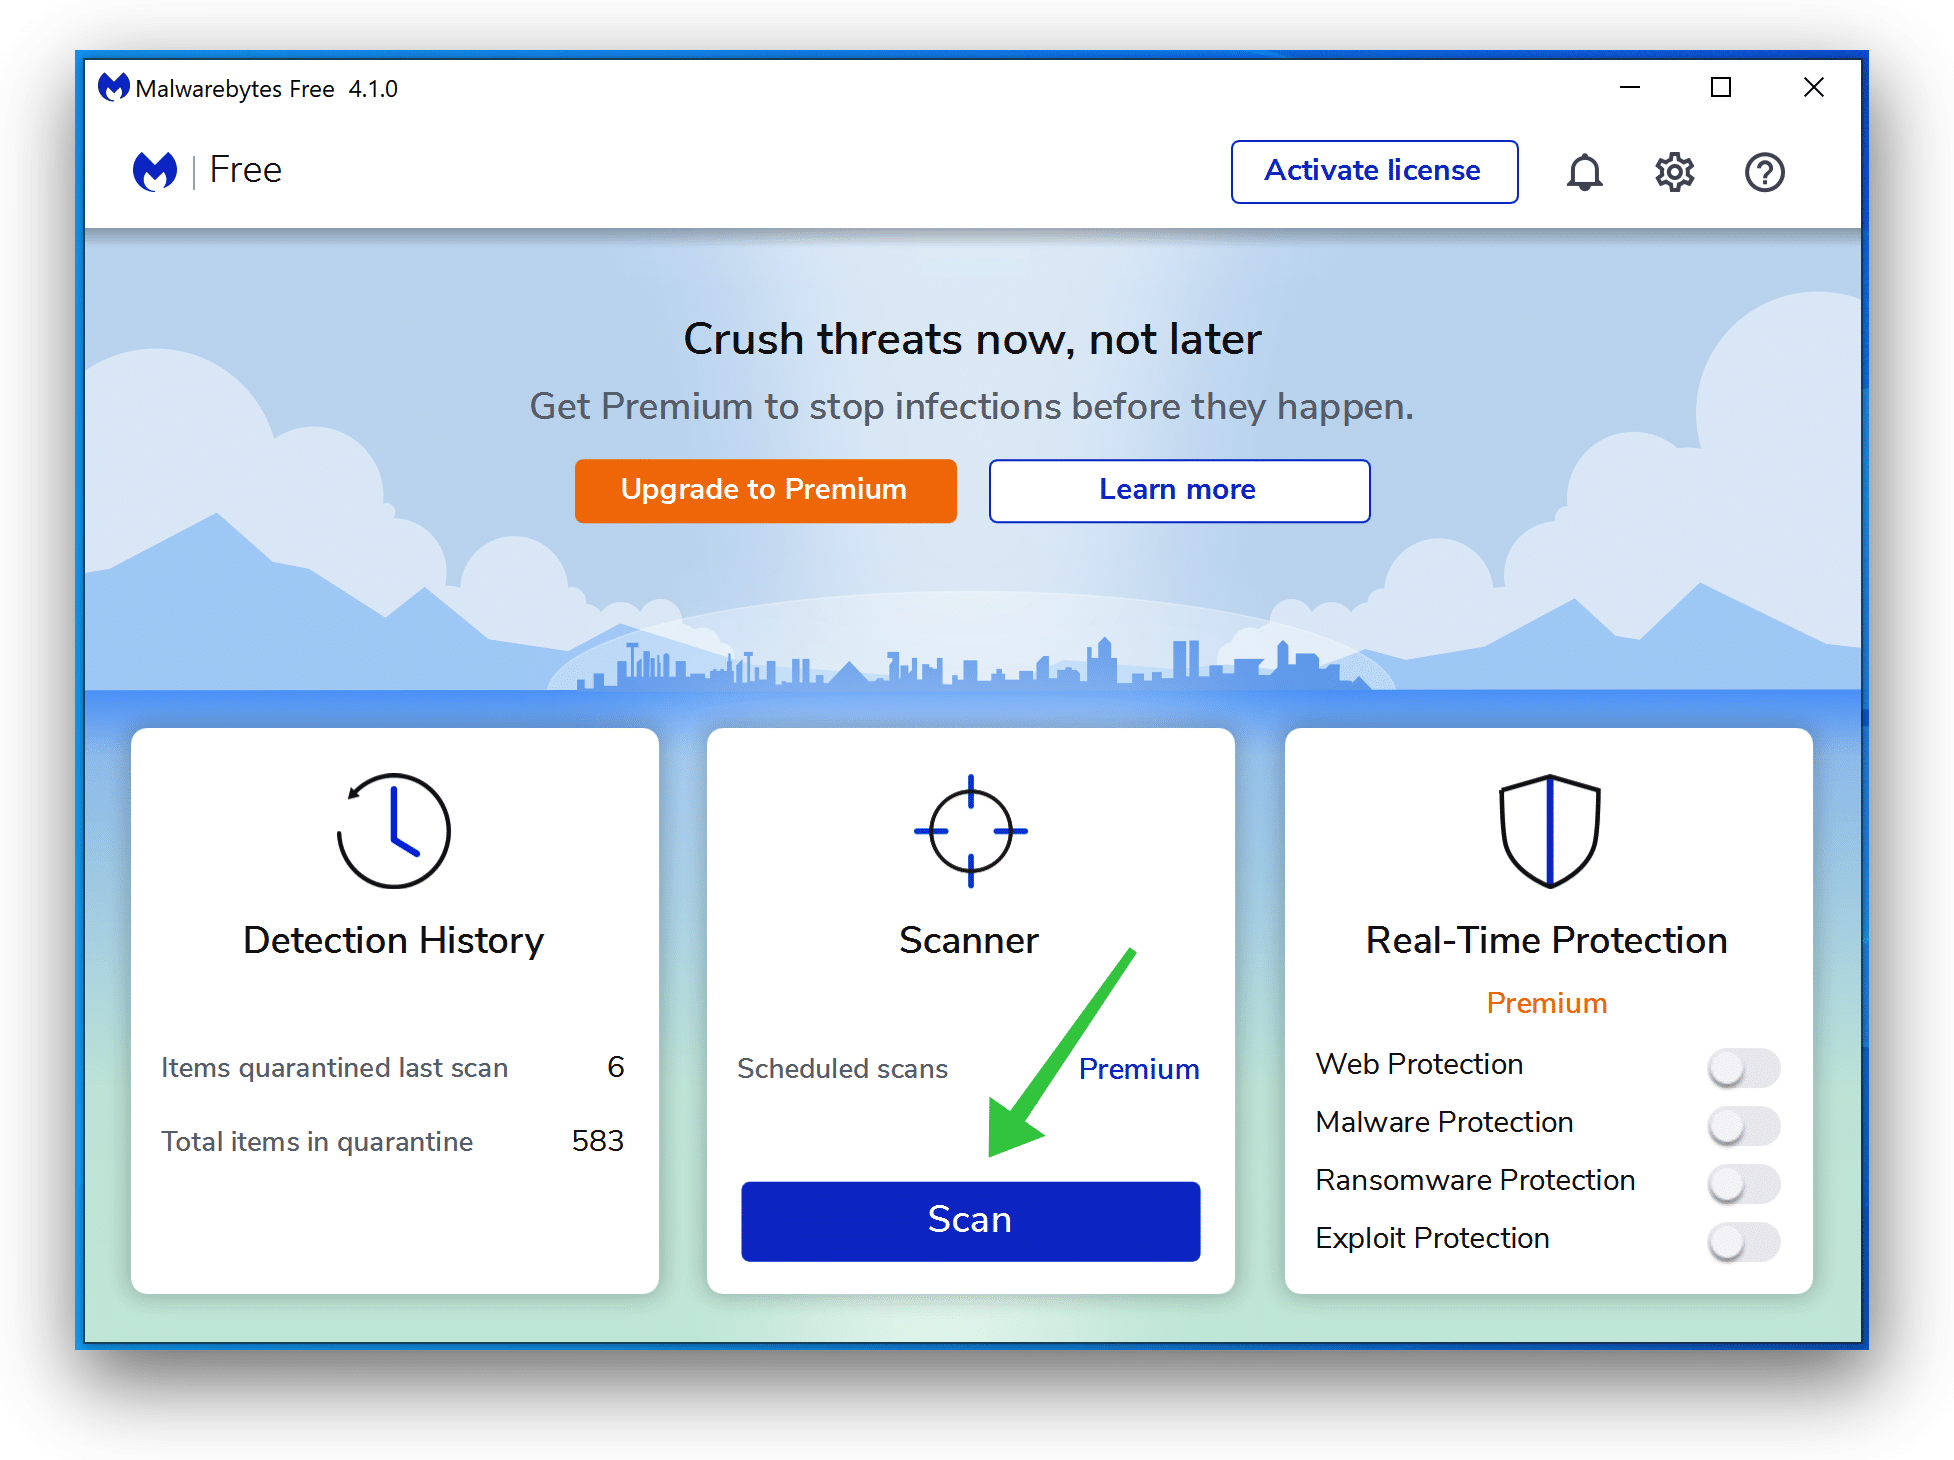
- Wait for the Malwarebytes scan to finish.
- Once completed, review the malware detections.
- Click Quarantine to continue.
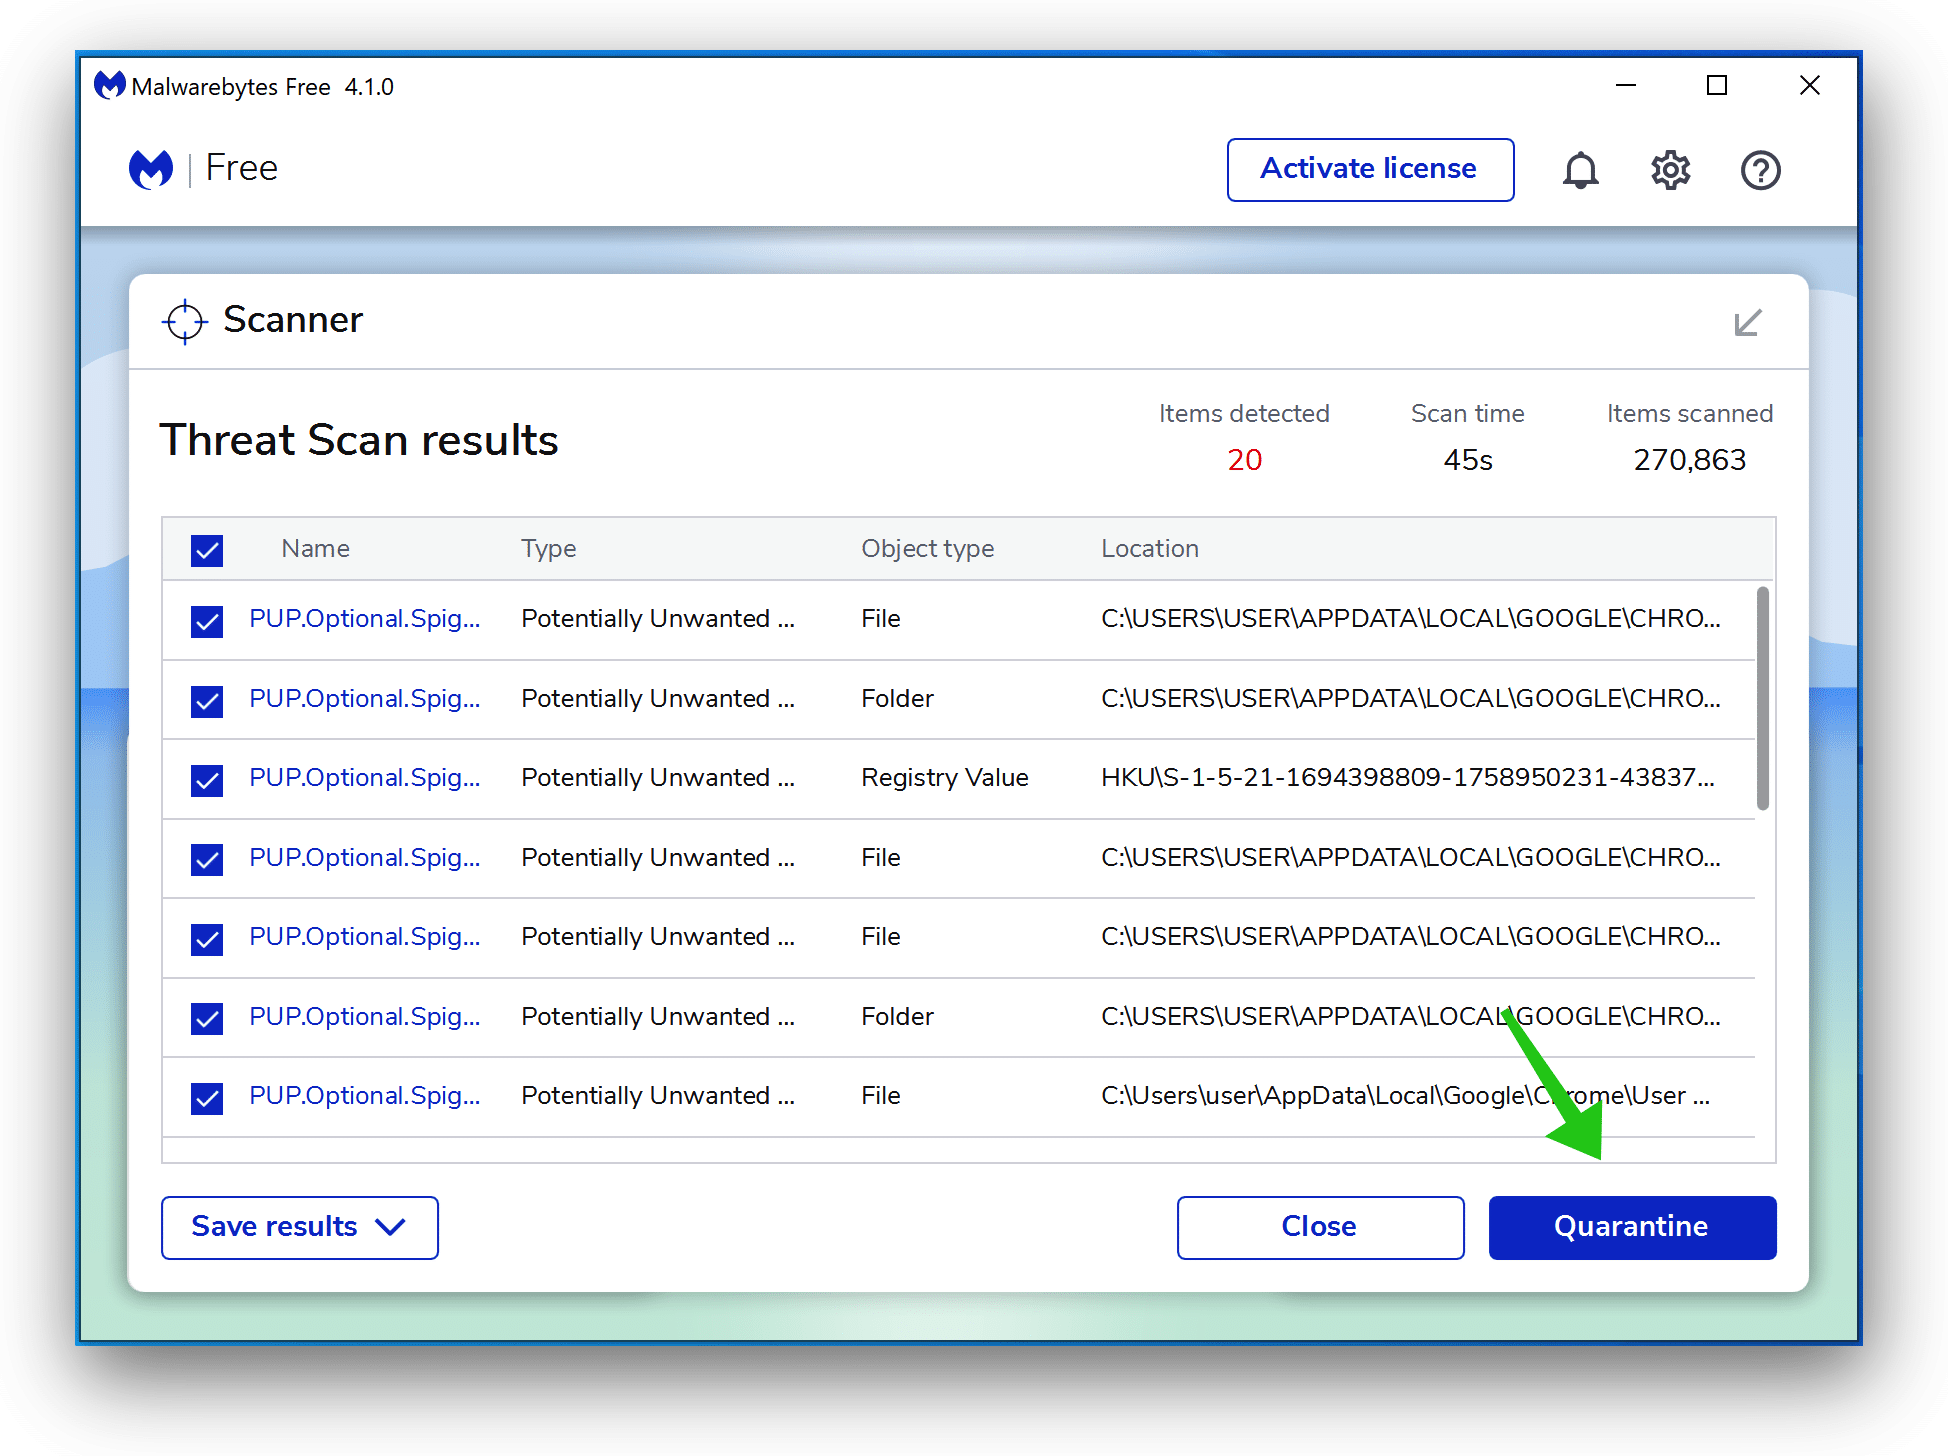
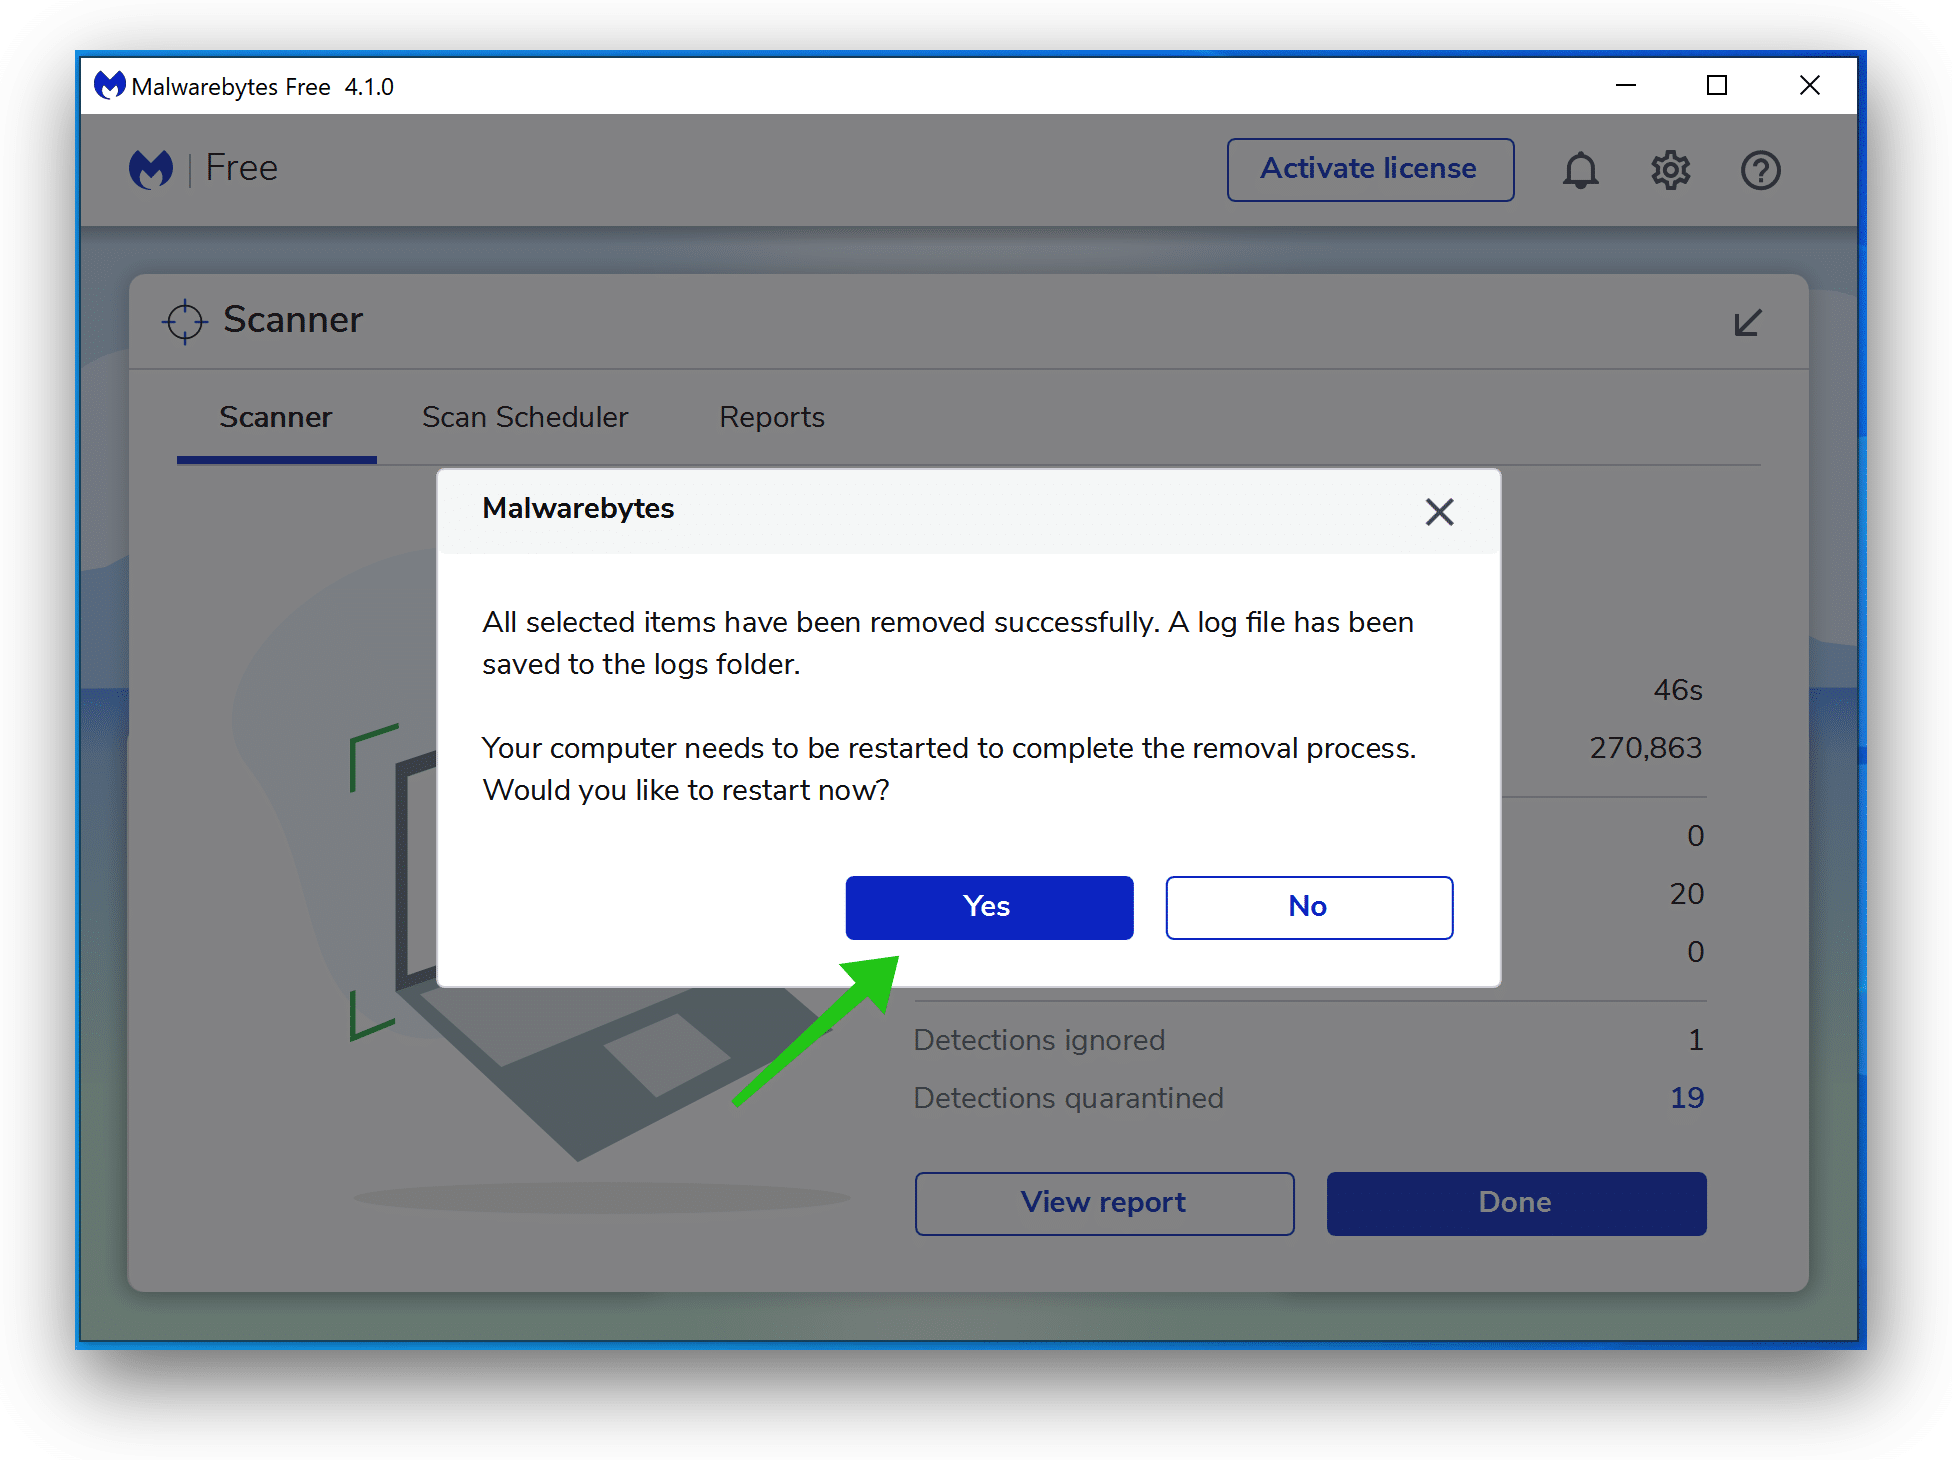
- Reboot Windows after all the malware detections are moved to quarantine.
AdwCleaner
AdwCleaner is a free utility software designed to remove adware, unwanted programs, and browser hijackers such as Harmonypix.com from your computer. Malwarebytes develop AdwCleaner, which is easy to use, even for non-technical users.
AdwCleaner scans your computer for potentially unwanted programs (PUPs) and adware that may have been installed without your knowledge. It searches for the adware that displays pop-up ads, unwanted toolbars or extensions, and other programs that may slow down your computer or hijack your web browser. Once AdwCleaner has detected the adware and PUPs, it can remove them safely and thoroughly from your computer.
AdwCleaner removes unwanted browser extensions and resets your browser settings to their default state. This could be useful if adware hijacked or modified your browser or a potentially unwanted program.
- Download AdwCleaner
- No need to install AdwCleaner. You can run the file.
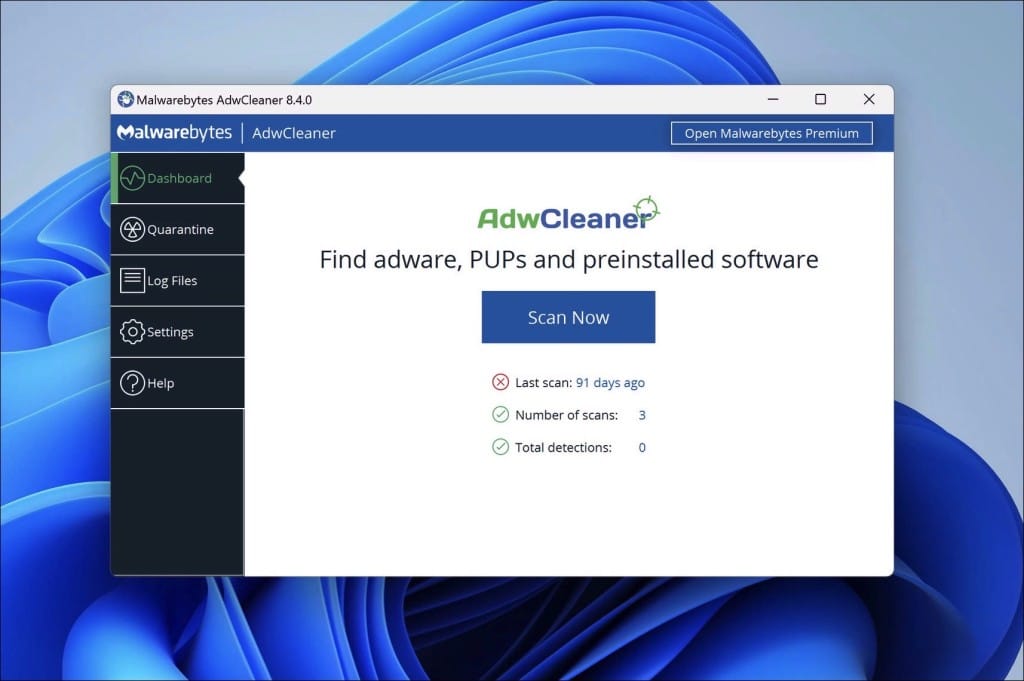
- Click “Scan now.” to initiate a scan.
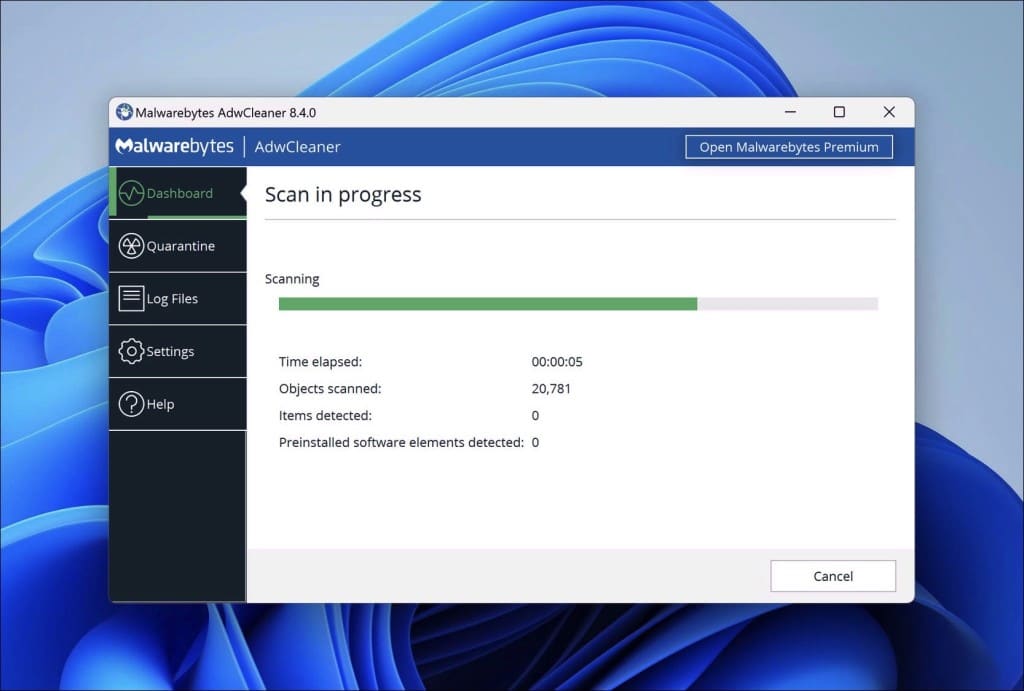
- AdwCleaner starts downloading detection updates.
- Following is a detection scan.
- Once the detection is finished, click on “Run Basic Repair.”
- Confirm by clicking on “Continue.”
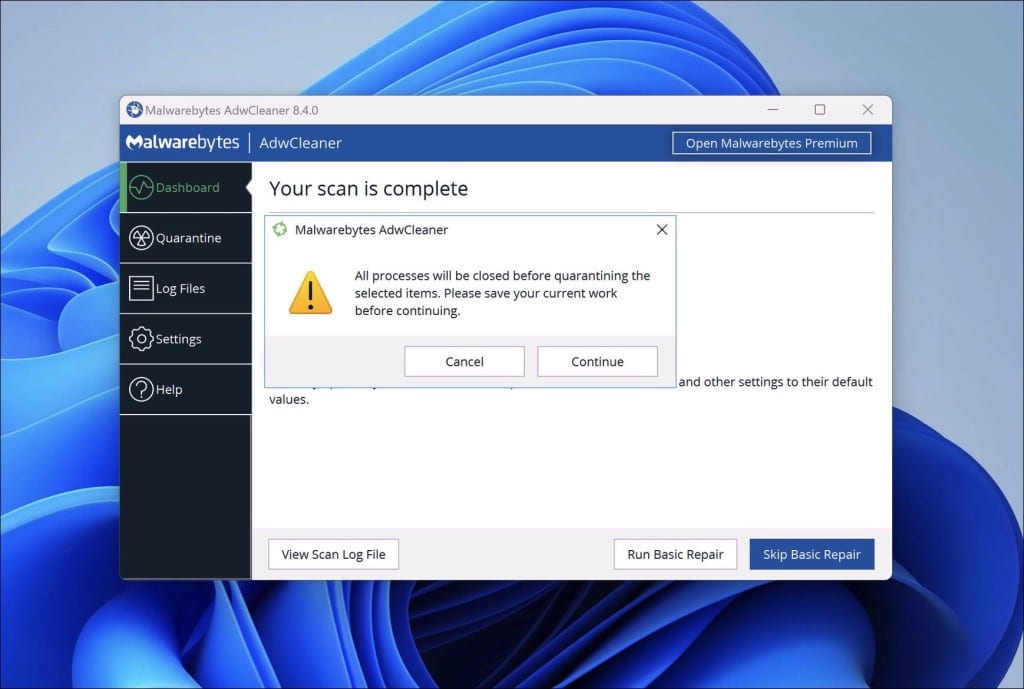
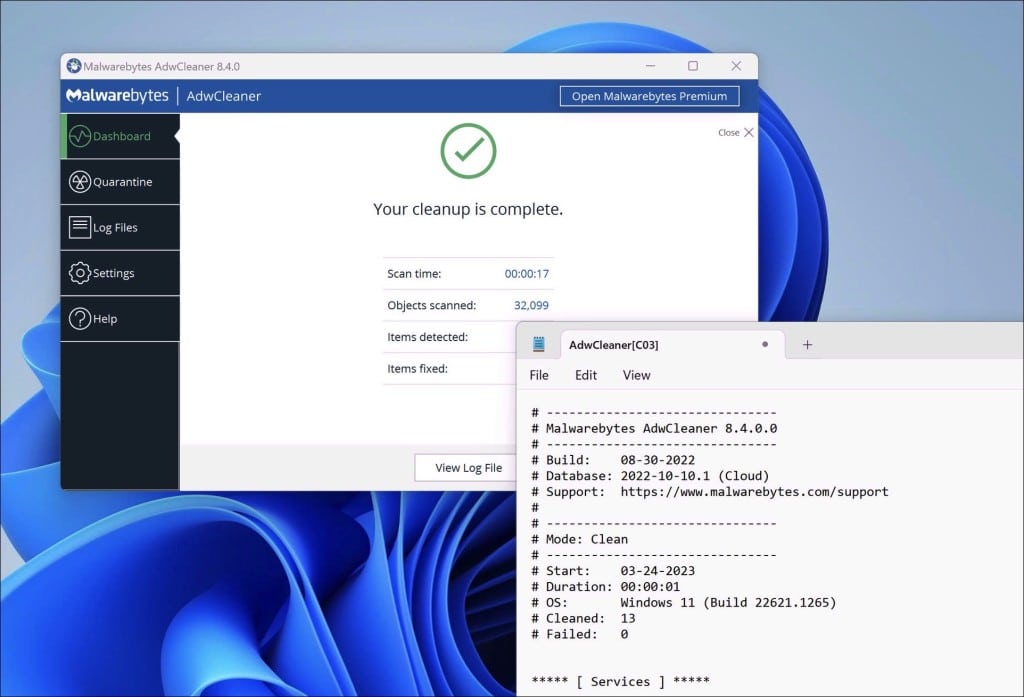
- Wait for the cleanup to complete; this won’t take long.
- When Adwcleaner is finished, click “View log file.” to review detections and cleanup processes.
ESET online scanner
ESET Online Scanner is a free web-based malware scanner that allows you to scan your computers for viruses and malware without installing software.
The ESET Online Scanner uses advanced heuristics and signature-based scanning to detect and remove a wide range of malware, including viruses, trojans, worms, spyware, adware, and rootkits. It also checks for suspicious system changes and attempts to revert them to their previous state.
You should run this free online scanner to detect any leftovers from your computer that other apps might have missed. It is better to be safe and sure.
- Open the ESET online scanner website.
- Click on “One-time scan.”
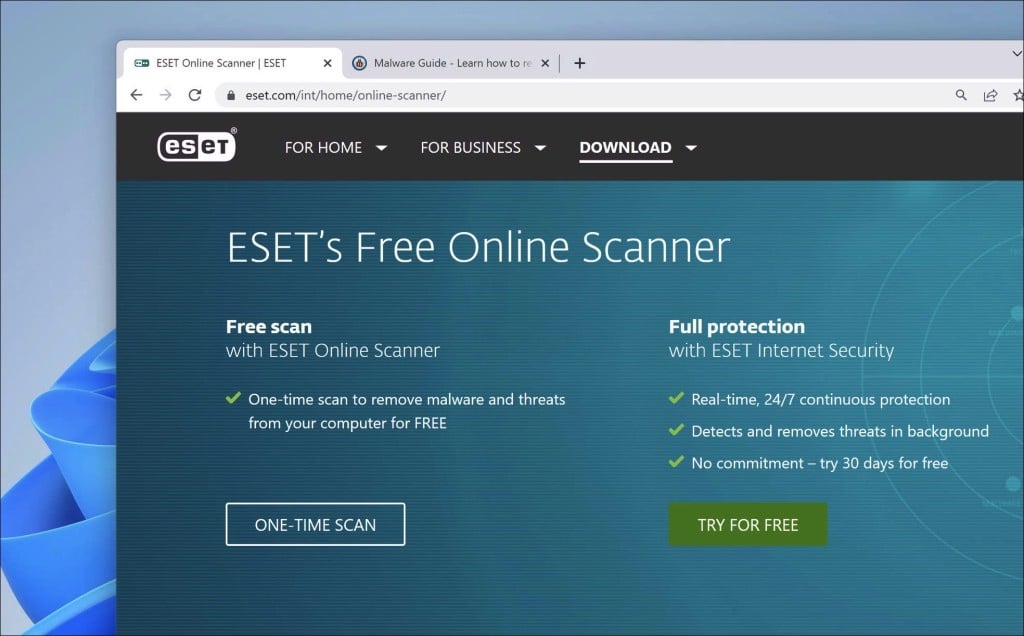
- The esetonlinescanner.exe app will be downloaded to your computer.
- You can find this file in your PC’s “Downloads” folder.
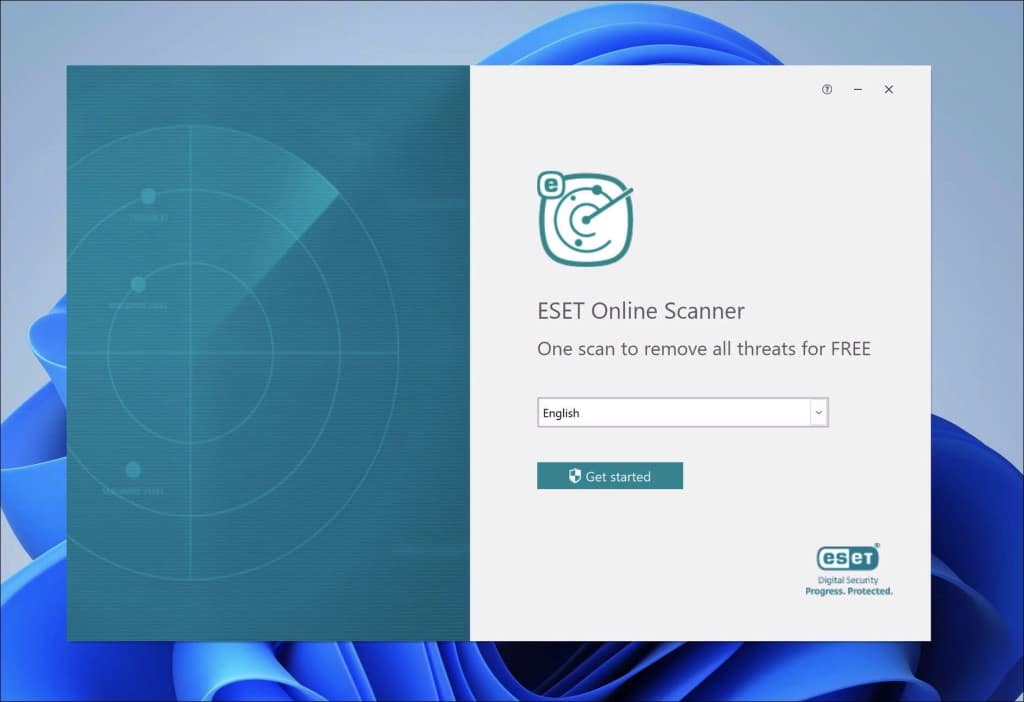
- Select the desired language.
- Click “Get Started.” to continue. Elevated permissions are required.
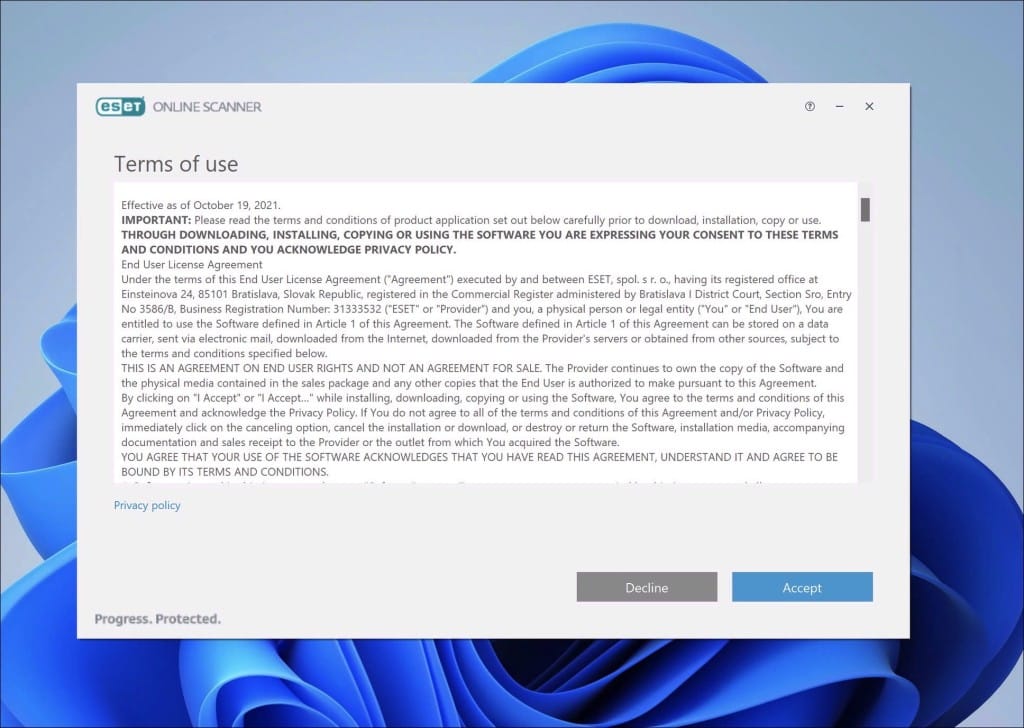
- Accept the “terms of use”.
- Click on “Accept.” to continue.
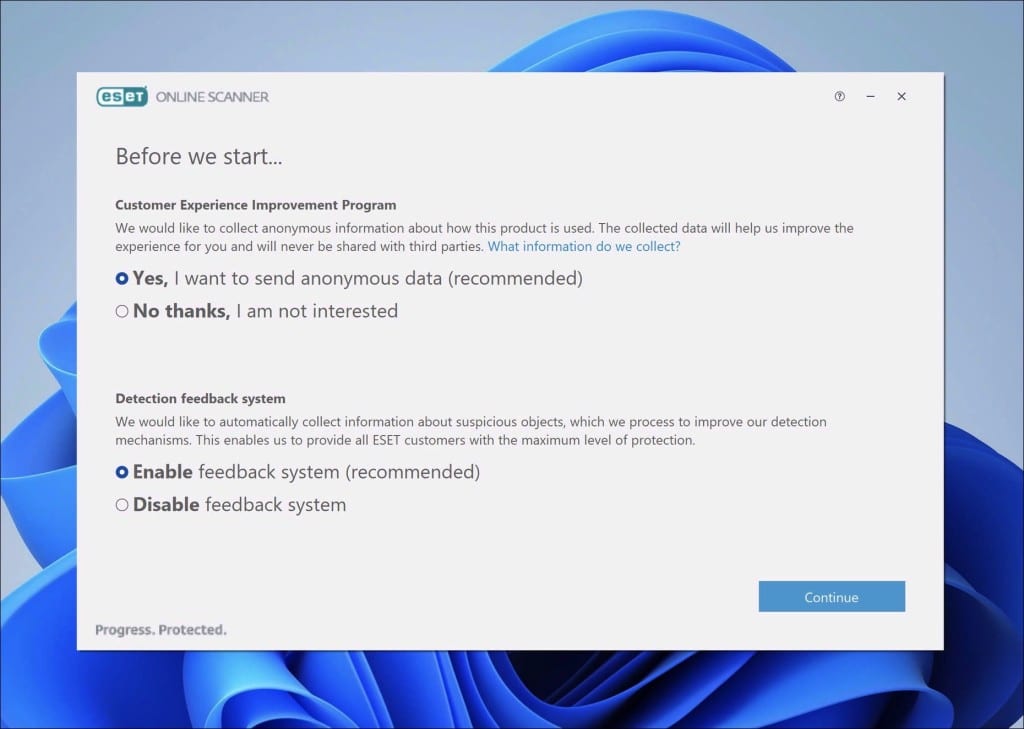
- Make your choice to participate in the “Customer Experience Improvement Program.”
- I recommend enabling the “Detected feedback system.”
- Click on the “Continue.” button.
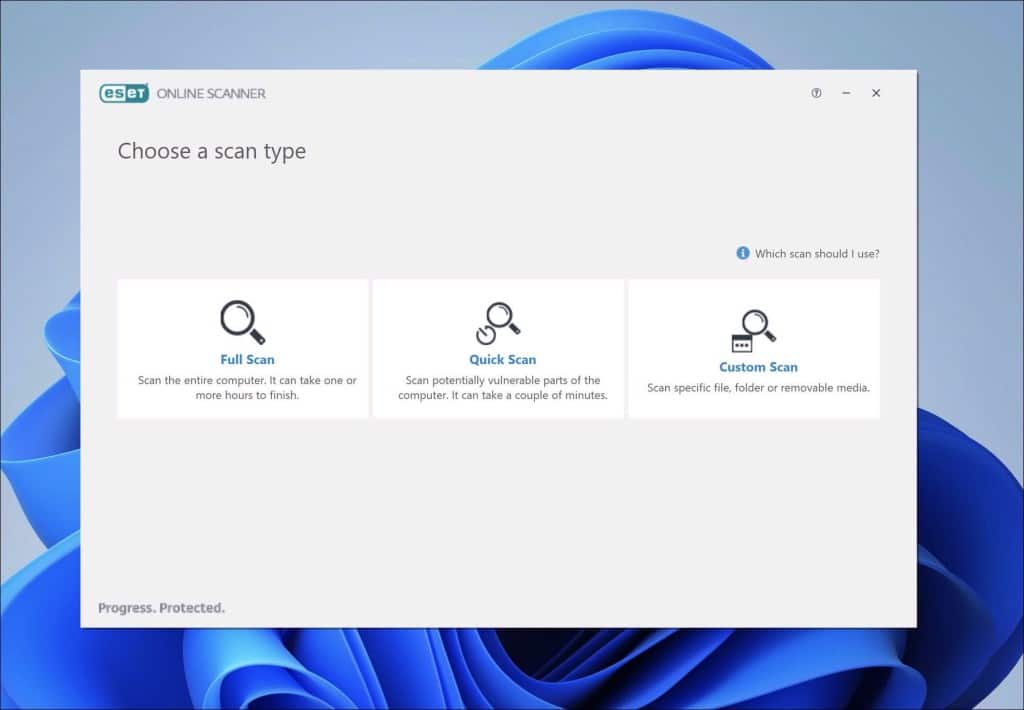
- There are three scan types to choose from. The first is the “Full scan,” which scans your entire computer but might take a few hours to complete. the second scan type is the “Quick Scan,” which scans the most common places on your computer for malware to hide. The last, the third one, is the “Custom scan.” This custom scan type can scan a particular folder, file, or removable media such as CD/DVD or USB.
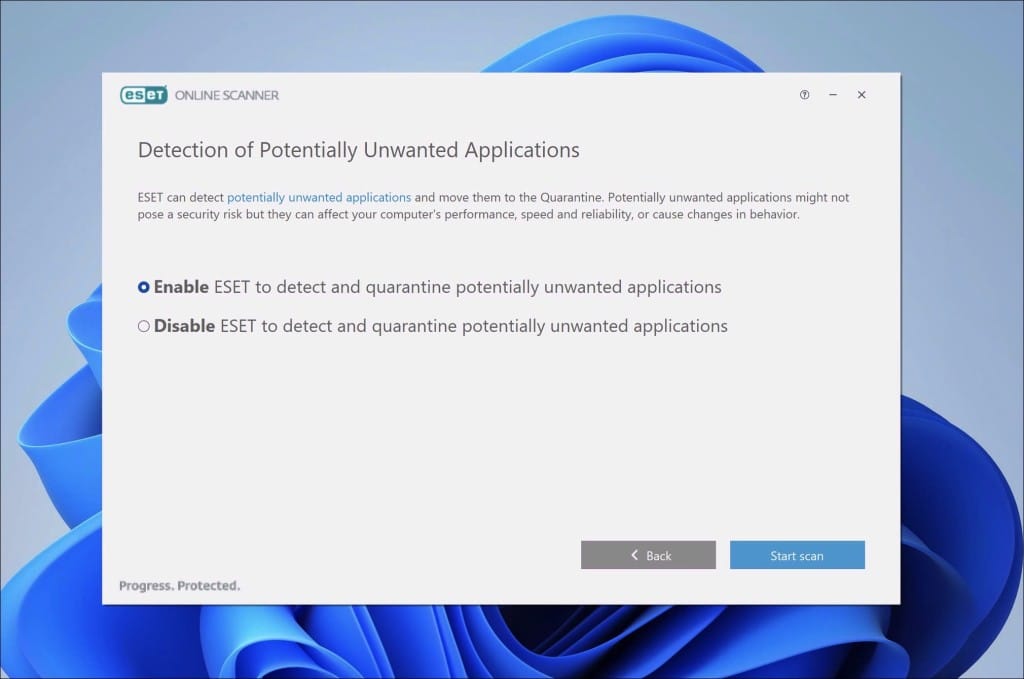
- Enable ESET to detect and quarantine potentially unwanted applications.
- Click the “Start scan.” button to initiate a scan.
- Scan in progress.
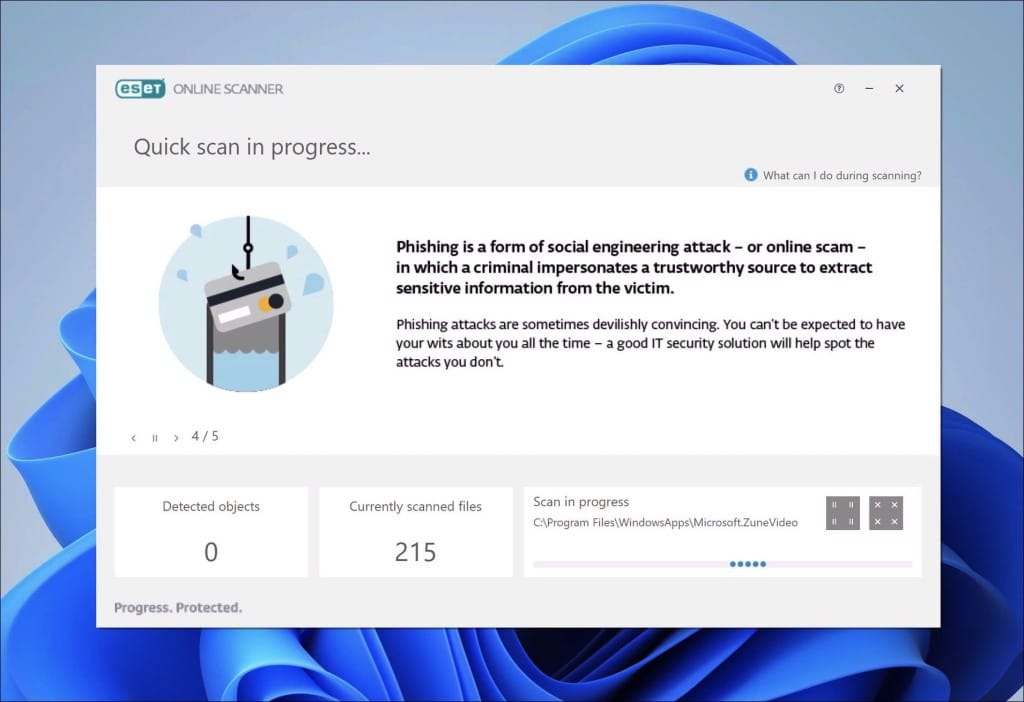
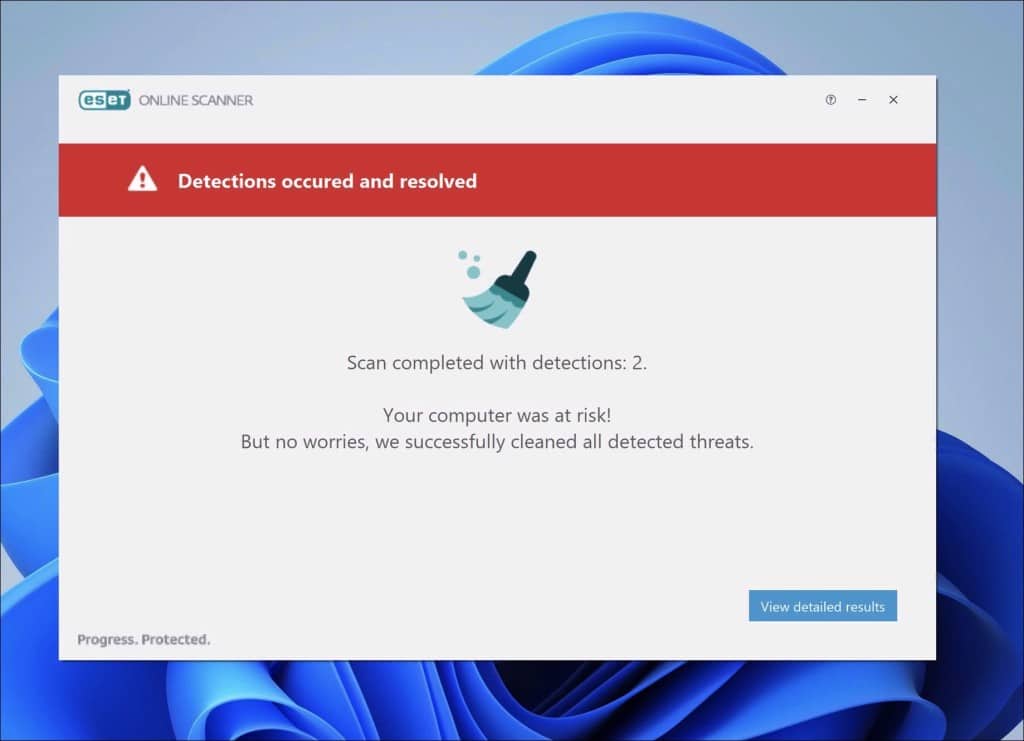
- If detections are found on your PC, the ESET Online scanner will resolve them.
- Click “View detailed results” for more information.
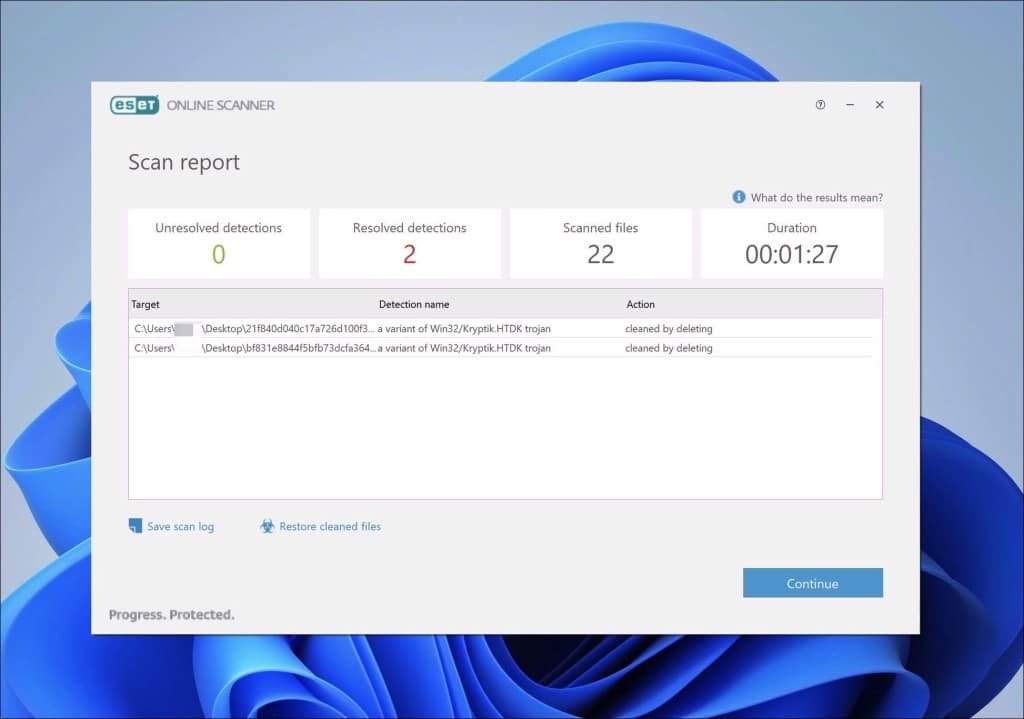
- Scan report is shown.
- Review the detections.
- Click “Continue.” once you are done.
Sophos HitmanPRO
HitmanPro is a cloud scanner. This means it can detect malware by uploading it to the Sophos cloud and then detecting it there. This is a different way to detect malware than other anti-malware tools. In doing so, it provides excellent protection and, generally through the cloud, can detect malware better and faster.
Once the Harmonypix.com pop-up is detected, HitmanPro will remove the malware responsible for this pop-up from your computer. If you continue to use HitmanPro, you will also be protected against all kinds of malware in the future.
- Download HitmanPro.
- Click the “Next” button to continue the setup.
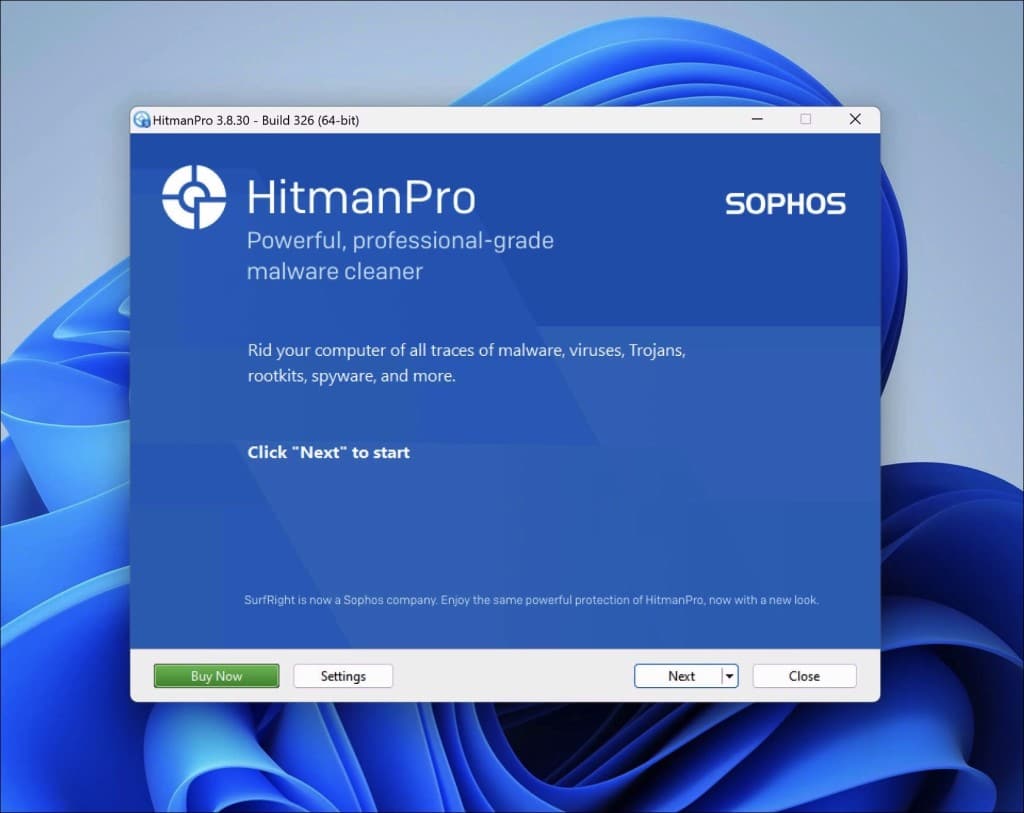
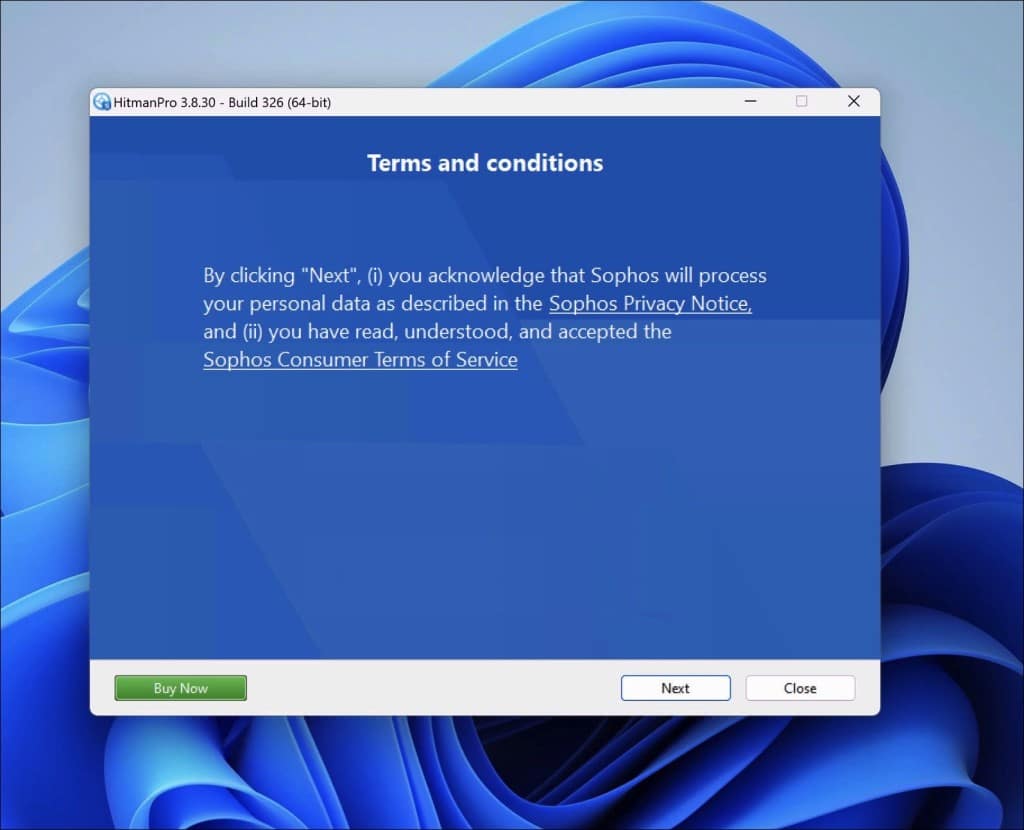
- Accept the terms and conditions to use Sophos HitmanPro.
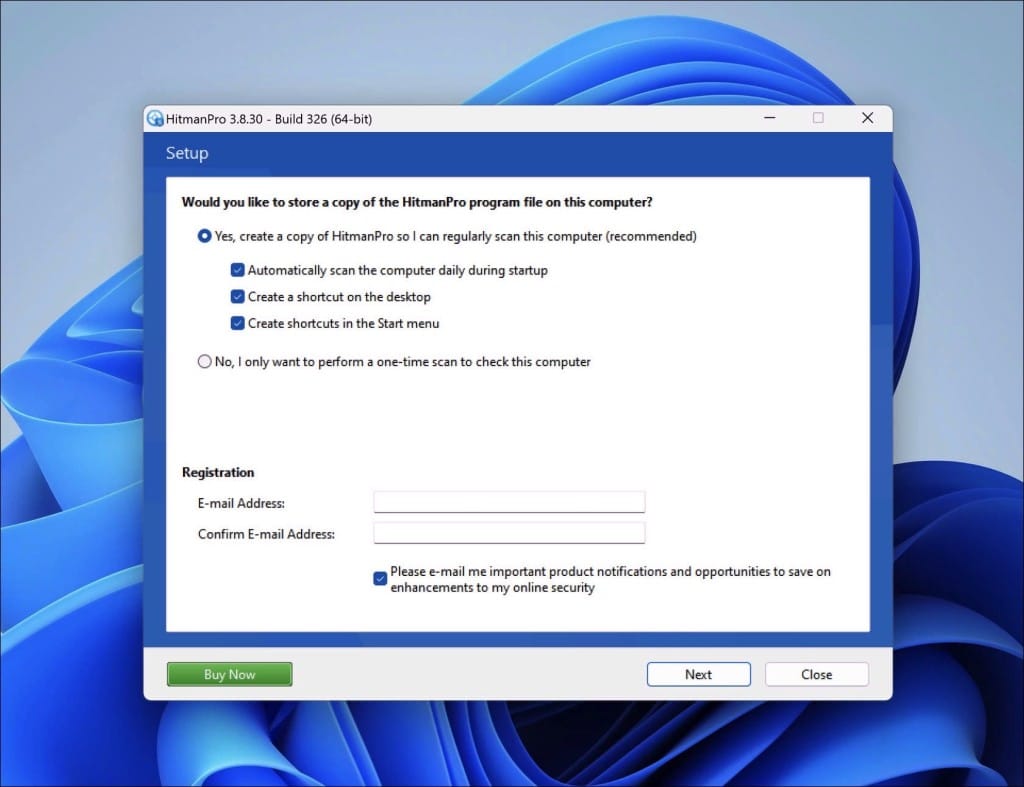
- If you want to scan your computer regularly, click “yes.” If you do not want to scan your computer more often, click “No.”
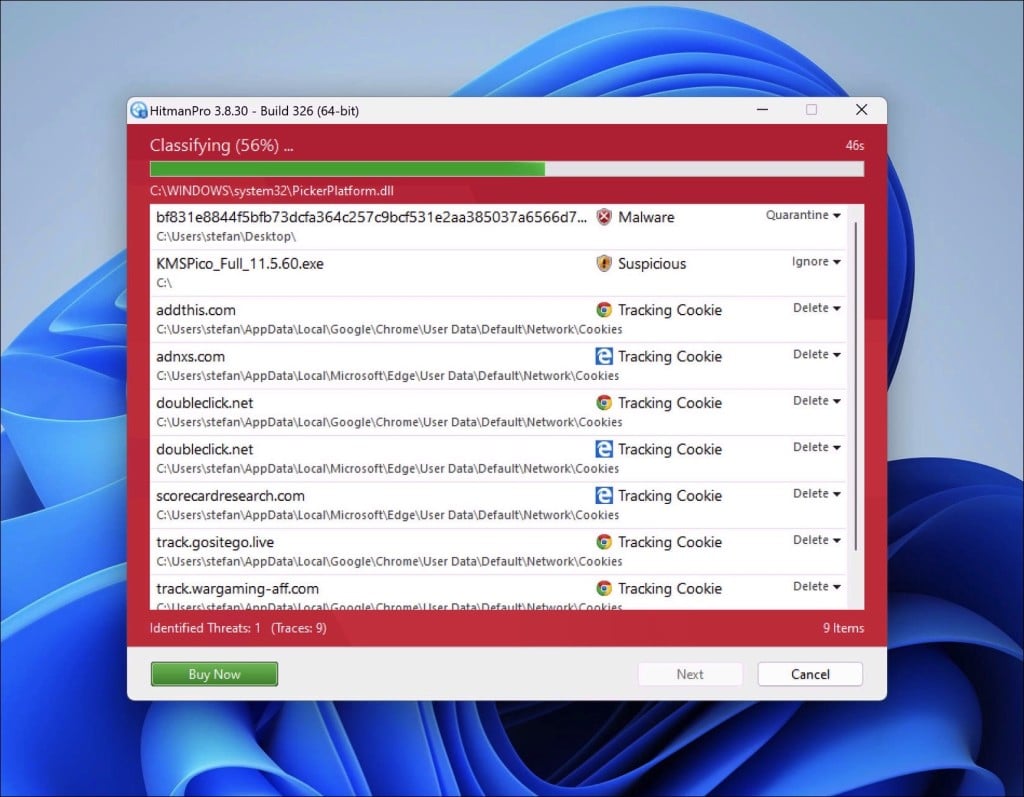
- Sophos HitmanPro will start a malware scan. Once the window turns red it indicates malware or potentially unwanted program have been found on your computer during this scan.
- Before removing the malware detections, you need to activate a free license.
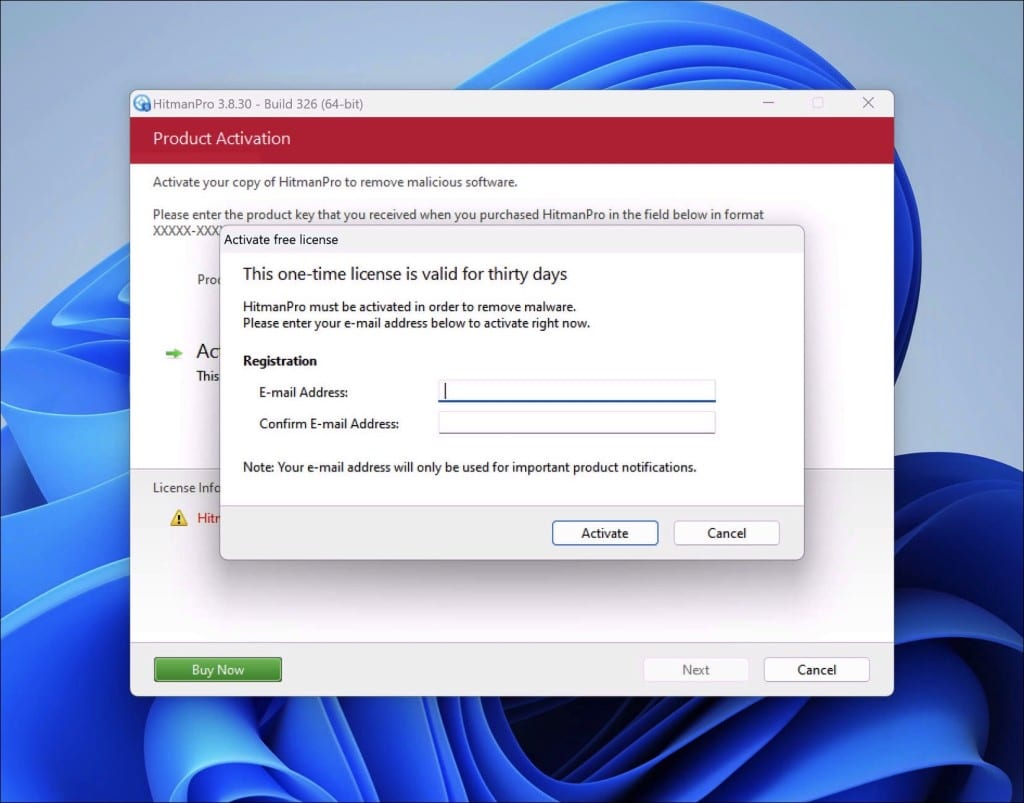
- Click on the “Activate free license.” button.
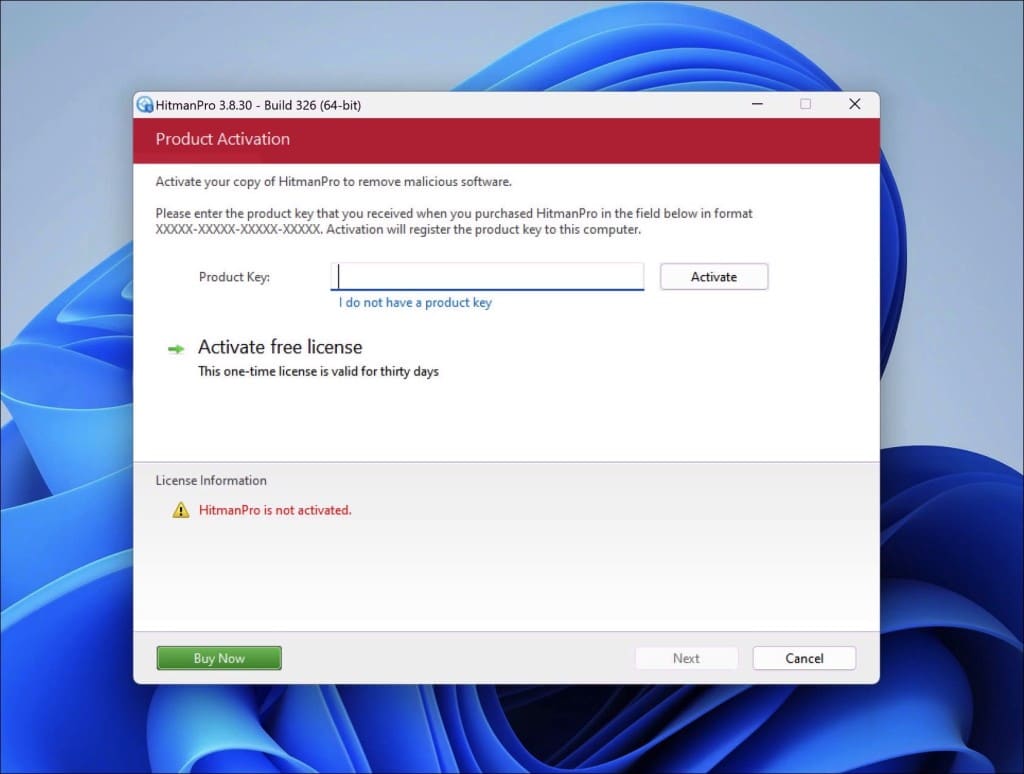
- Provide your e-mail address to activate the one-time license, valid for thirty days.
- Click on the “Activate” button to continue the removal process.
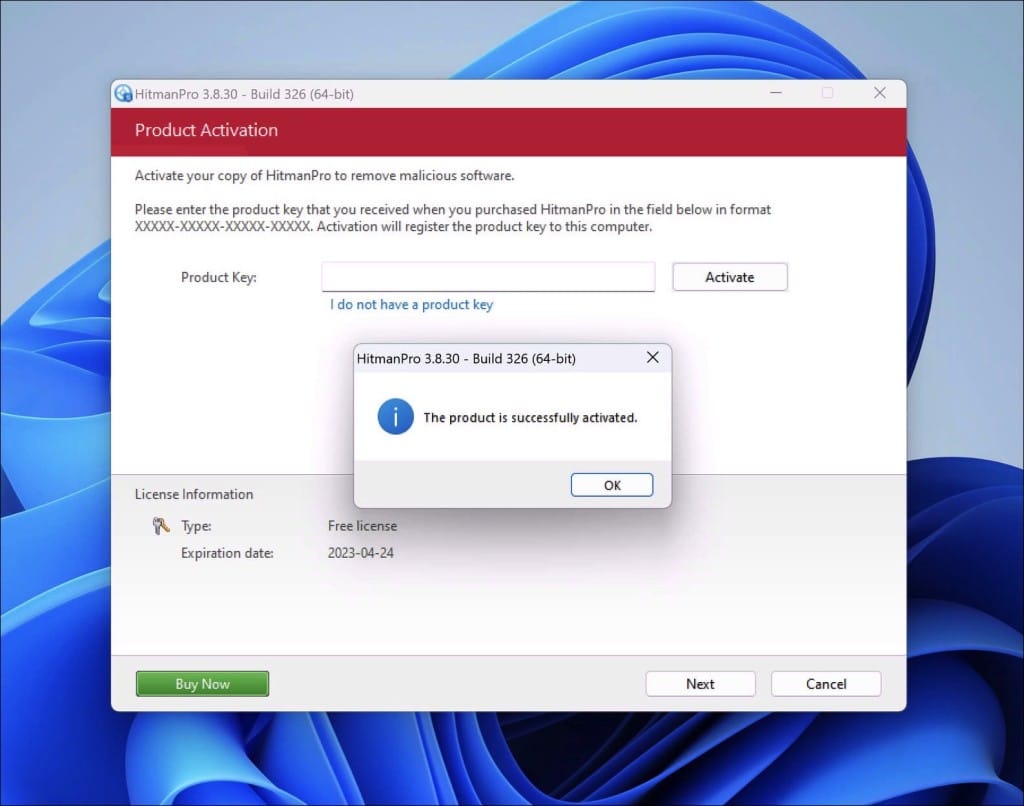
- The HitmanPro product is activated successfully.
- We can now continue with the removal process.
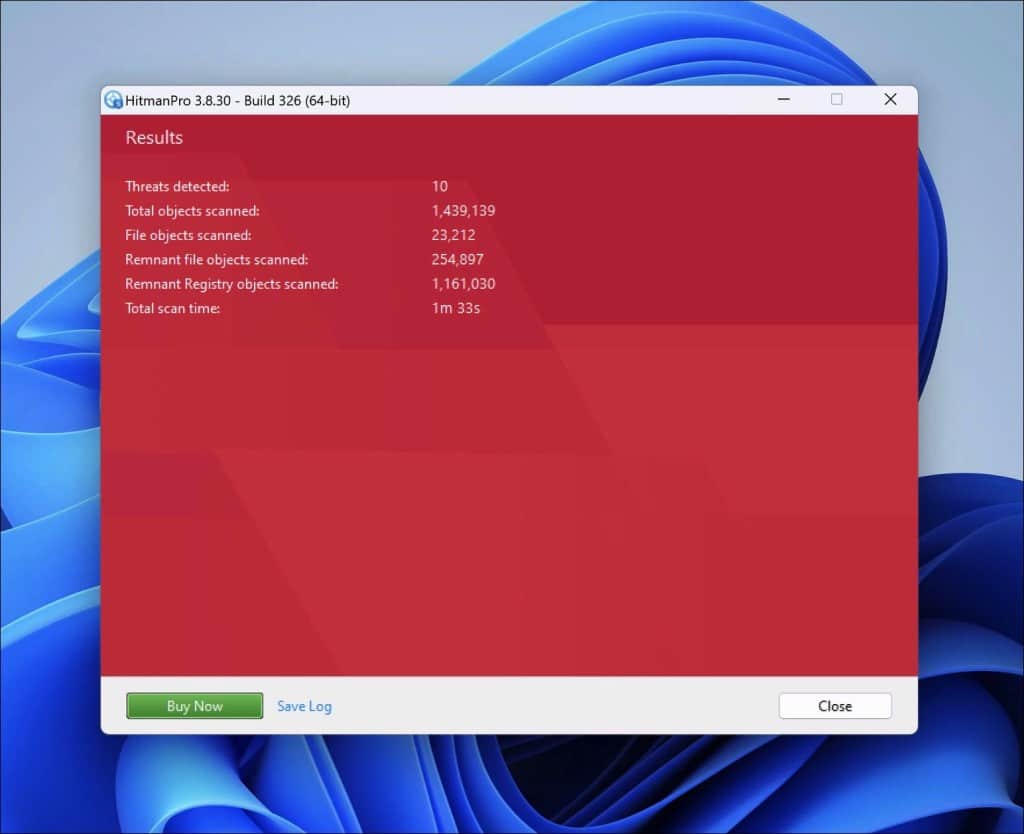
- Sophos HitmanPro will remove all detected malware from your computer. When it is done, you will see a summary of the results.
Adware removal tool by TSA
Adware removal tool by TSA is a free app that you can use to remove adware from your computer. This app can detect and remove adware. It offers other functions besides adware removal. For example, it allows you to remove browser hijackers such as Harmonypix.com from Google Chrome, Firefox, Internet Explorer, and Microsoft Edge browser.
In addition, it removes toolbars from the browser, malicious browser extensions, and if nothing works, you can use it to reset the browser. This way, the browser is restored to default values. The adware removal tool does not require installation. It is a portable app that you can open without installation. For example, this makes running from USB or a recovery disk suitable.
Download Adware Removal tool by TSA
Once you start the app, the adware removal tool updates its adware detection definitions. Next, click the “Scan” button to start an adware scan on your computer.
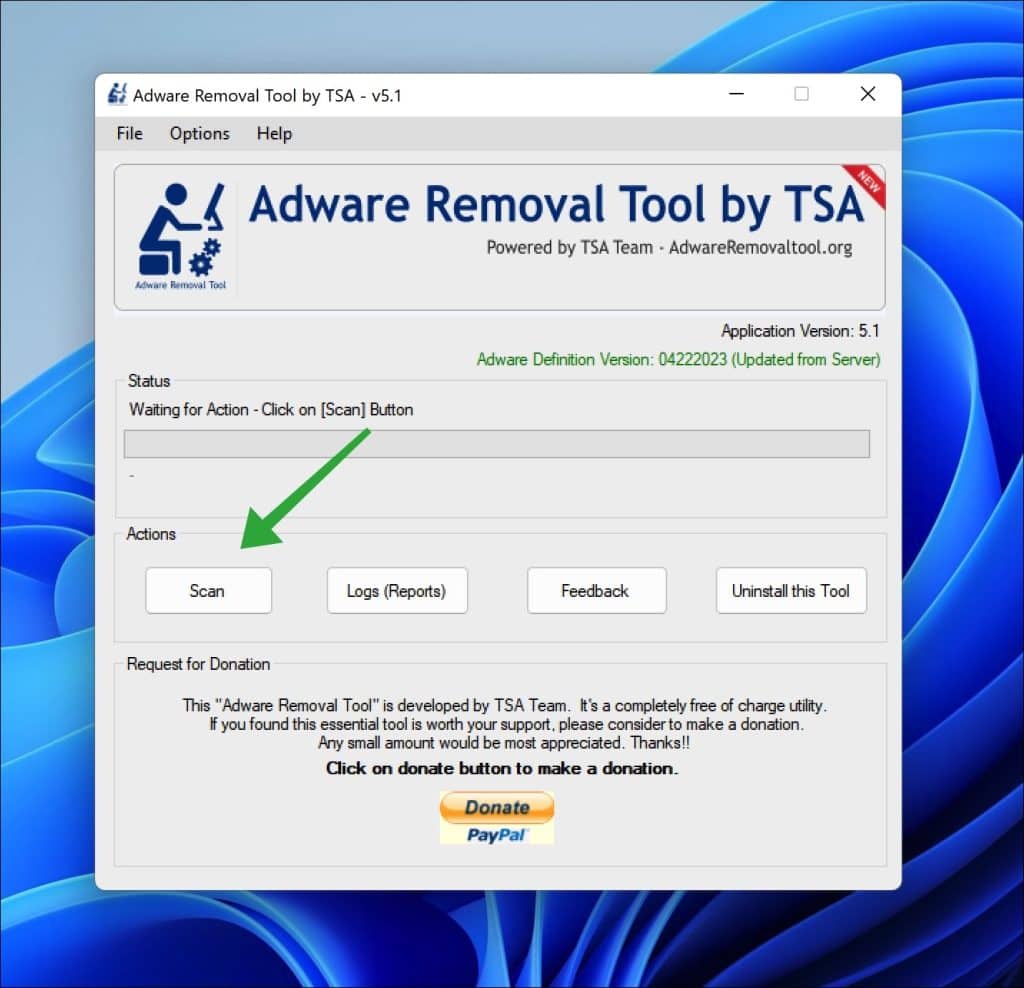
Follow the on-screen instructions to remove detected adware from your PC for free. Next, I advise installing Malwarebytes browser guard to prevent Harmonypix.com ads.
Malwarebytes browser guard
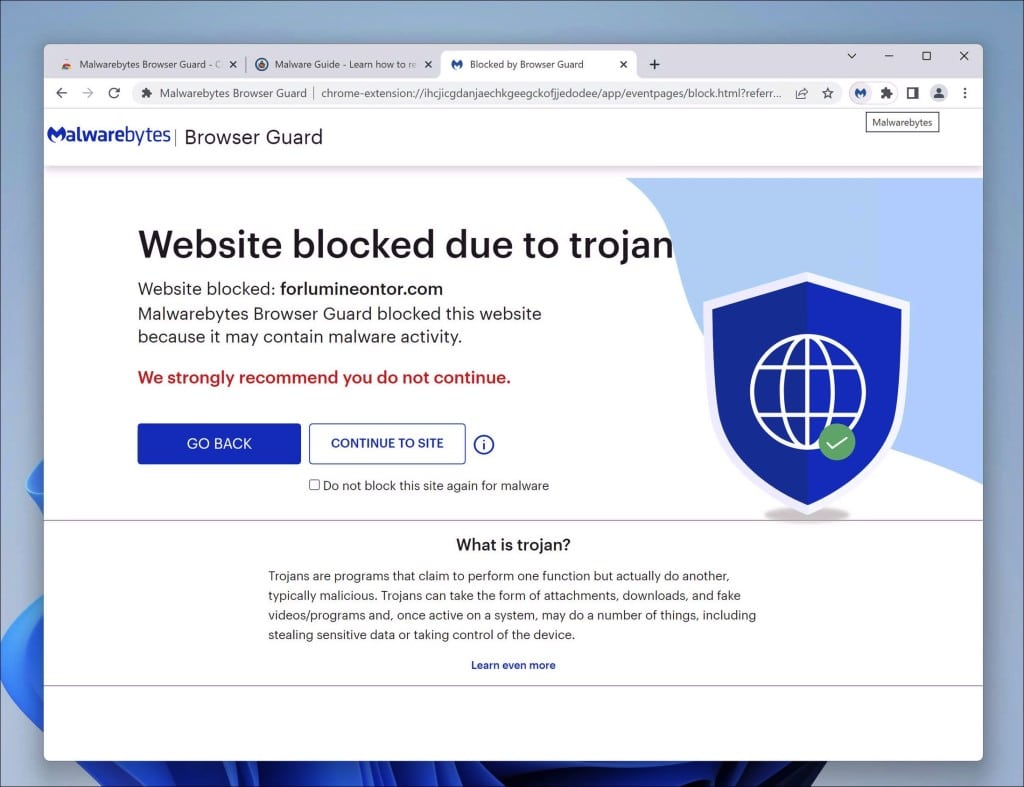
Malwarebytes Browser Guard is a browser extension. This browser extension is available for the most well-known browsers: Google Chrome, Firefox, and Microsoft Edge. When installed Malwarebytes browser guard, the browser is protected against multiple online attacks. For example, phishing attacks, unwanted websites, malicious websites, and crypto miners.
I recommend installing Malwarebytes browser guard to be better protected against Harmonypix.com now and in the future.
- Download Malwarebytes browser guard.
- Click to install on the preferred browser.
When browsing online, and you might accidentally visit a malicious website, Malwarebytes browser guard will block the attempt, and you will receive a notice.
In this guide, you have learned how to remove Harmonypix.com. Also, you have removed malware from your computer and protected your computer against Harmonypix.com in the future. Thank you for reading!